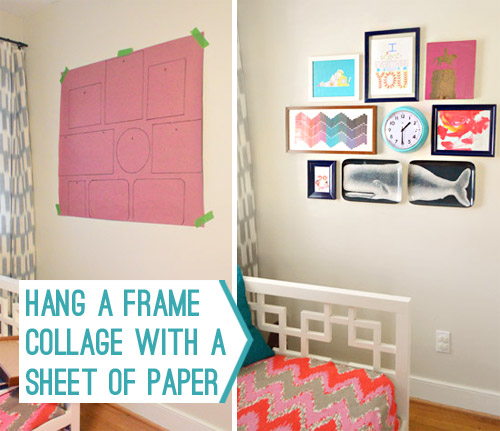
We finally got a frame grouping up on the wall in the playroom/future big-girl room. And as predicted it was definitely inspired by the bean. It’s full of things we think will be helpful and fun for her, and when it came to hanging it we tried a little alternative to our usual paper template method (which we outlined here when we hung our hallway frame wall). This time around we tried an old Candice Olson trick. Basically you use a giant roll of paper to make one big template (we used some protective paper from Home Depot leftover from our kitchen reno). Do you guys remember when she used to do this all the time back when her show had that sceee-bah-dee-dap-deee-dow-ahhh scatting intro? The good news is that any type of paper will work, so even if you just have a few pieces of printer paper taped together or a poster board or two, it should accomplish the same goal.
The first step to this project was bringing in all of the frames and art we have (most of which was cluttering up this room when it was a junk room, and was later tucked into the closet in the guest room) and laying it all out on the floor. Sure, it makes the room look crazy for a second, but it’s nice to see everything all spread out.
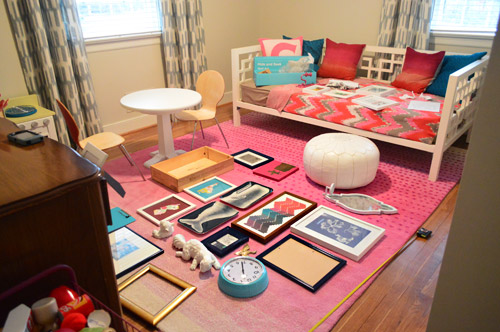
Then we just shuffled things around on the rug in a few different arrangements and switched things in and out and up and down until we liked the look of things. Oh but one tip is to measure the wall and take a guess about how wide and how long you want the arrangement to be and lay out two tape measures if you have them, just like we did below. That way you can try to build an arrangement in that predetermined width and height.
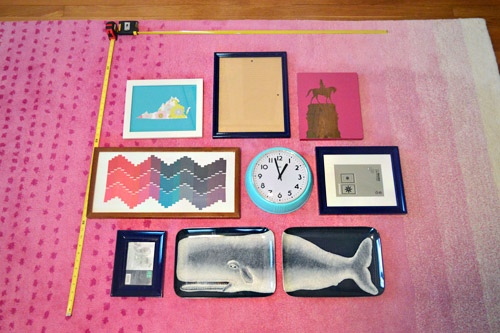
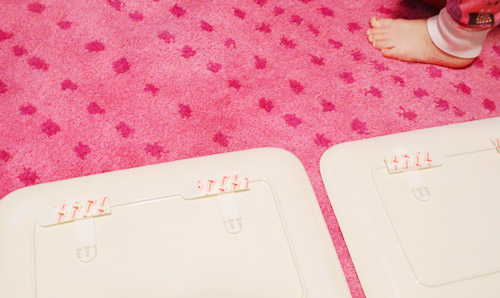
Once we were happy with the arrangement, we broke out the paper from the basement and cut a piece to that size. If we were smart we would have built the arrangement on the paper to begin with, but it only took about a minute to slip the paper under everything so it was sitting on that instead of the rug.
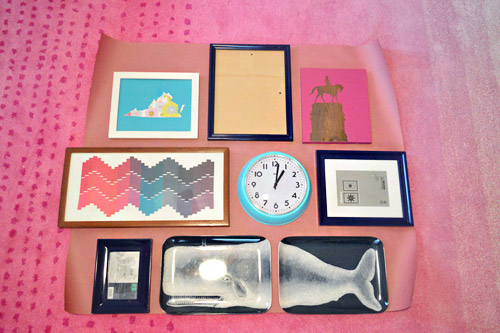
After we made sure we liked everything’s placement by nudging a few things around just a little here and there, we broke out the marker and traced the outline of each item onto the paper. That made it look sort of like a kid’s puzzle (easy to reassemble, if you know what I mean). Of course it’s important to use a marker that doesn’t bleed through and mark up your rug (we used a washable black Crayola marker from Clara’s collection since we worried a Sharpie might go through). Oh but just marking the art’s outline isn’t all. The key is also to mark where the nail – or nails – need to go on each item in order to hang it.
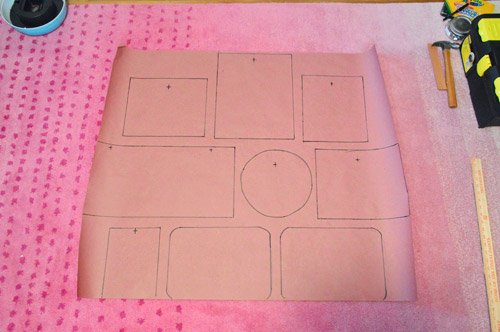
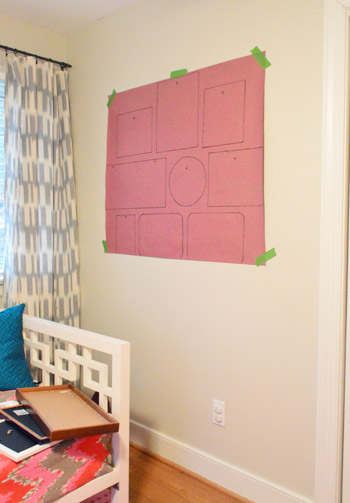
That way when you tape the paper up on the wall you know what goes where from the outline and you know where to actually put the nails thanks to those “x” marks you’ve made on each one. As for how we pinned down exactly where each nail should go on the template, we just measured where the hook or wire was on the back of the frame (ex: centered and an inch down from the top) and transfered that measurement to our paper by marking the center and going down an inch before making an x for the nail spot).
Oh and one “duh” tip would be to make sure your paper isn’t slanting up or down on the wall or you’ll end up with a wonky arrangement (we grabbed a level and ran it along a few parallel frame edges that we had drawn to make sure they were level before proceeding).
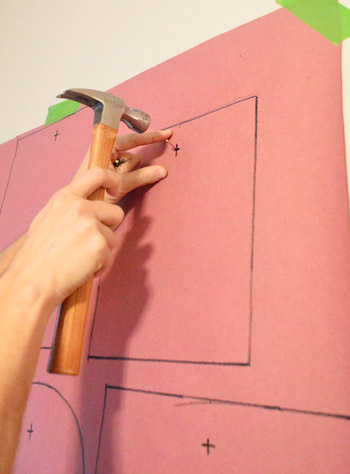
Then you can just hammer a nail right through the paper at each marked nail spot to hang things.
Then just rip the paper down after you add all the nails. They happily stay in the wall and the paper should come down with one swift tug.
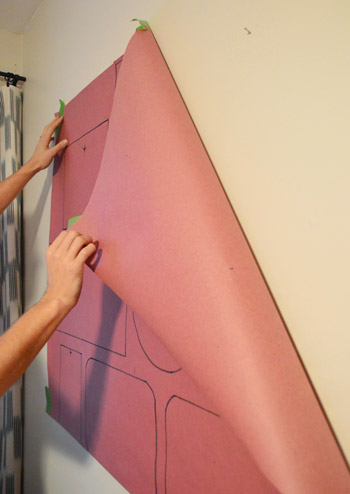
Then you’re all set to hang each item on the assigned nails. Boom. No measuring at all.
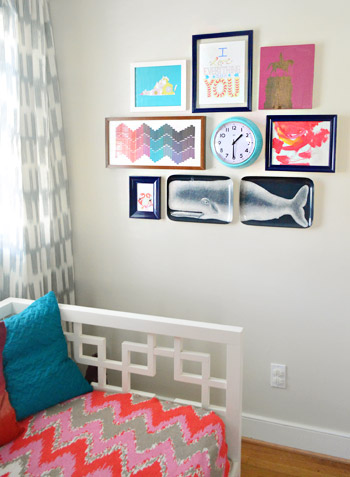
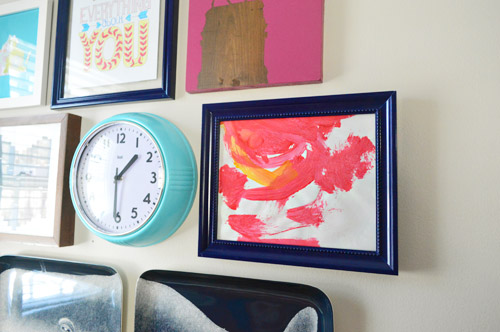
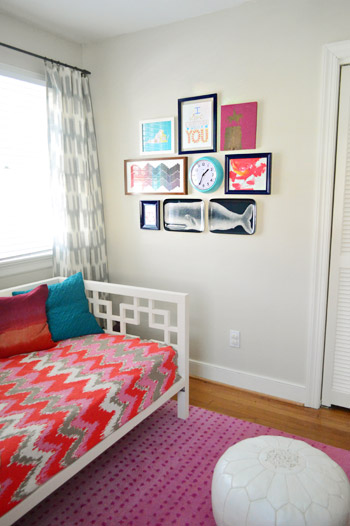
As for the significance of the stuff we framed, we thought the clock would be functional since a few friends of ours have said they’re great to have in big kid rooms since you can say things like “when the short hand is on the eight you can get up in the morning.” Not sure if she’ll take our word on that once she moves into this room, but it’s a nice romantic idea. Ha!
A few items are especially meaningful book projects that we did (the Virginia cut-out art, the zig-zag paint chip art, the navy frames that a bunch of things are hanging inside, and the wood painted art with a Richmond monument on it). Then there are some other things in the mix like the red and orange painting that Clara made herself…
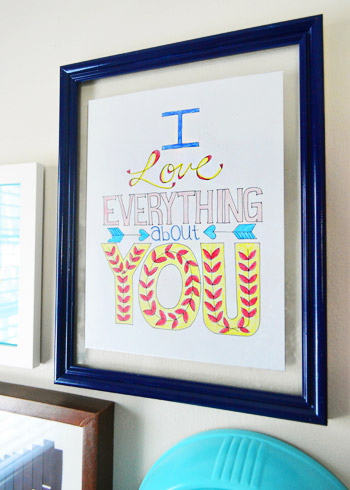
… and a sweet free printable that I got here and filled in with colored pencils.
There’s even a fabric napkin from HomeGoods that I grabbed for a few bucks and have been dying to frame.
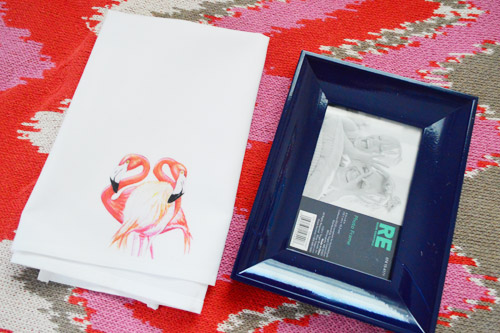
I just cut it down to size and shoved it in. You know the girl likes flamingos…
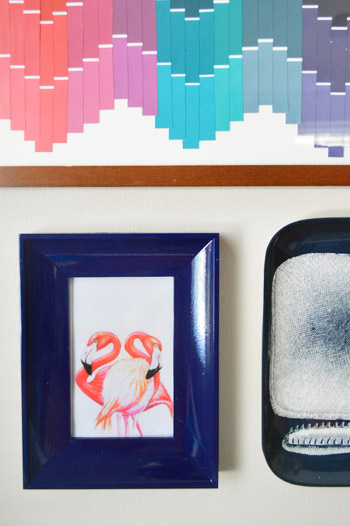
And on the bottom next to the framed former-napkin, there are two plastic trays from Marshall’s a while back (they’re meant to be serving trays, but I just used 3M to hang them up among the mix).
We like how the navy in the frames and the whale trays ties into the curtains we made.
So that ends the giant paper template adventure that left an old blank spot in the room looking sweet and personalized for the bean. What are you guys hanging? Ever use the giant piece o’ paper technique? Have you hung any trays or napkins on the wall? Do you sort of miss that weird old scatting Candice Olson intro? I don’t think I realized how hilarious it was until it was gone. I took it for granted. Sniffle.
More posts from Young House Love


Original article and pictures take www.younghouselove.com site
Комментариев нет:
Отправить комментарий