

Our Striped Tumbling Blocks Quilt is a story of seeming simplicity coming from seeming complexity. At first glance, you may see a straightforward field of stripes, but then the terrain may rearrange itself into a magical three-dimensional city of cubes. And then, you may realize that, really, every piece of this quilt top is identical and that its creation required no magic at all!
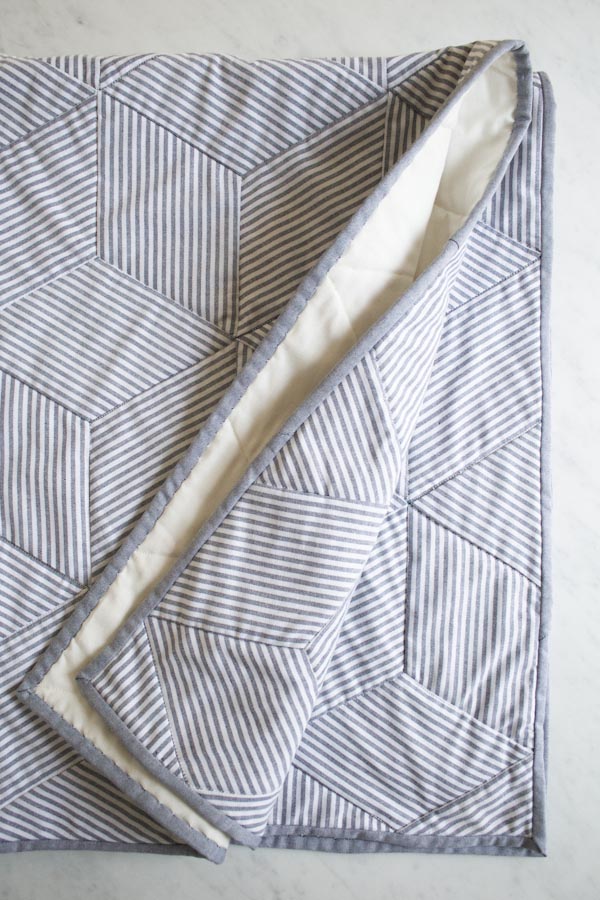
In quilt making, as in life, I have found that nothing is as hard as it seems, if you just break the task down into manageable steps. This Striped Tumbling Blocks Quilt is a prime example. While the Y seams and odd angles of this classic quilt block may seem daunting, there is nothing actually hard about it. Just work carefully through the pattern and allow the illusion to unfold!

Materials

- 1 ½ yards of Moda’s Muslin 45-inch, 60 X 60 Count, White
Size
Finished Dimensions: 39 X 46 inches
Notes
Prewash, dry, and press all of the fabric (but not the batting) before beginning.
All seam allowances are ¼ inch.
If you are using a fabric without a clear right or wrong side, as we are here, just choose either side as the right side.
Cut
If you’re new to rotary cutting, please refer to our Rotary Cutting Tutorial before you start.
From the solid fabric …
- Cut four 52 X 2 ¼-inch strips. These are the Binding Strips. Put them aside until the “Bind” section.
From the Muslin…
- Cut a 43 x 50-inch rectangle. This is the backing. Put this aside until the “Baste” section.
From the striped fabric…
- Cut 108 identical pieces. Each piece is a parallelogram with two 60-degreee corners, two 120-degree corners, and four 5 ¼-inch sides. Here is how you cut them…

With the wrong side of the fabric facing up cut a 54 x 4 ¼-inch strip. Cut it so that the stripes are parallel to the long edges of the strip. Orient the strip so that the long edges run along the top and bottom and the wrong side of the fabric is facing up.
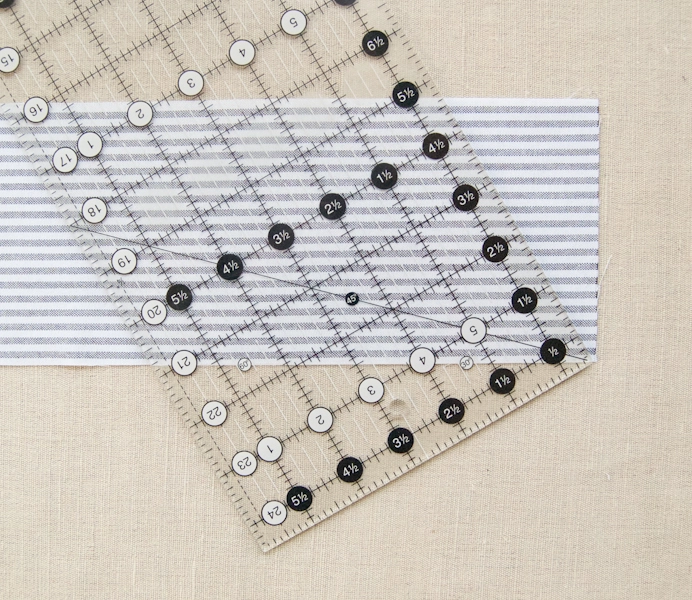
At the bottom right corner, use the markings on your rotary cutting ruler to measure a 60-degree angle. The 60-degree mark of the rotary cutting ruler should run along the bottom edge of the strip, creating a 60-degree angle between the bottom edge and the right-hand side of the ruler.


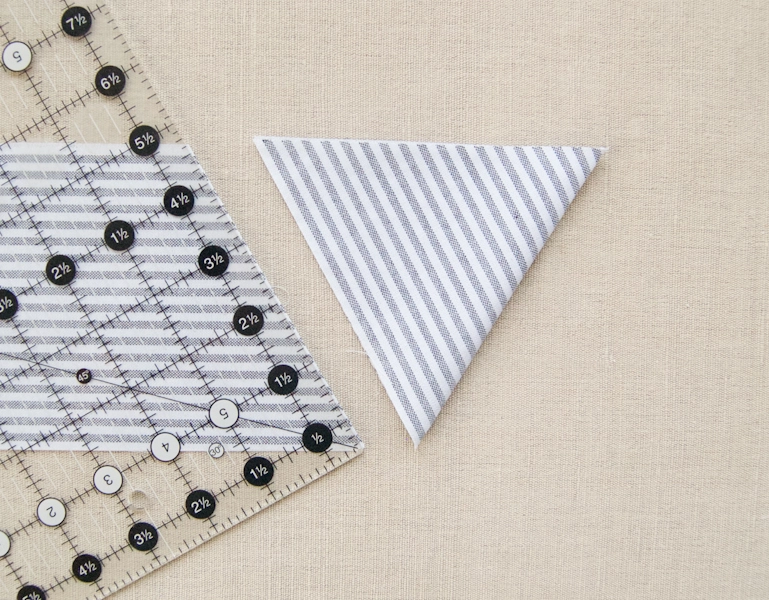
Place the ruler along the left-hand edge of this triangle. Again orient it so that the 60-degree mark of the rotary cutting ruler runs along the bottom edge of the strip, as shown above.
Use the rotary cutter to cut along the right-hand side of the ruler.
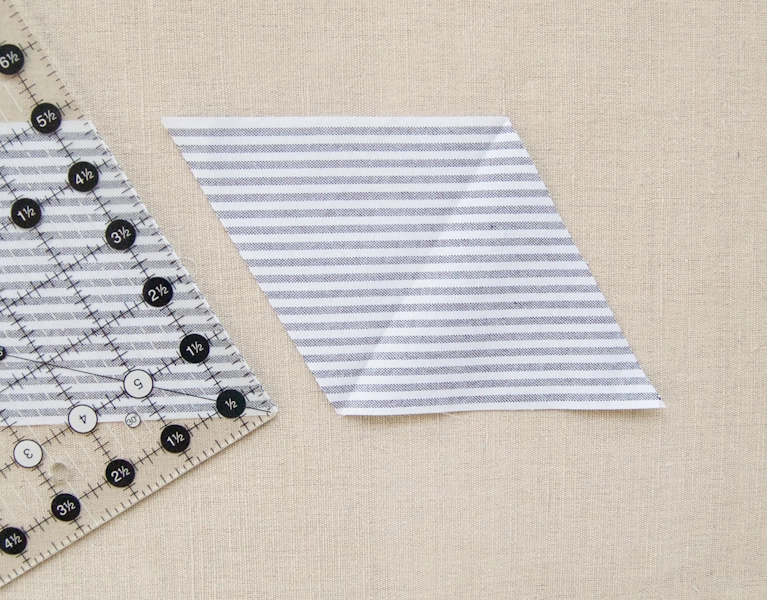
Mark

Line the Quilt and Sew Ruler ¼ inch from and parallel to a straight edge of a piece, and make an approximately ½-inch mark at both the corners. Do this along all four edges.

Repeat for all 108 pieces.
Piece the Full Tumbling Blocks

Each Full Tumbling Block is made from 3 pieces. The pieces are identical, but you spin them in three different orientations when you sew them together. With right sides up…
- Piece A has the stripes running from upper left to lower right, with the acute angles at the left and right
- Piece B has the stripes running straight up and down with the acute angles at the upper left and lower right.
- Piece C has the stripes running from upper right to lower right, with the acute angles at the upper right and lower left.
Seam 1
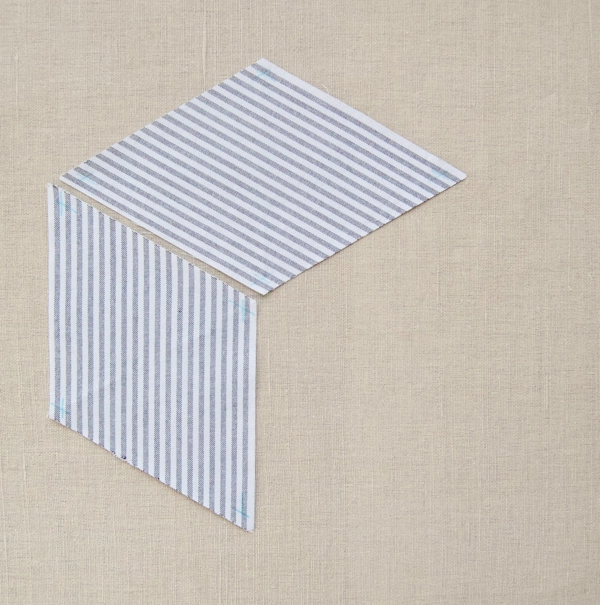
Begin the Full Tumbling Block by sewing together a Piece A and a Piece B. With right sides together, pin these two pieces along Piece A’s bottom left edge and Piece B’s top edge. Here’s how…

First, pin the pieces together at the two Corner Points. Place the pins exactly through the Corner Point of both pieces, lining them up as perfectly as you can.
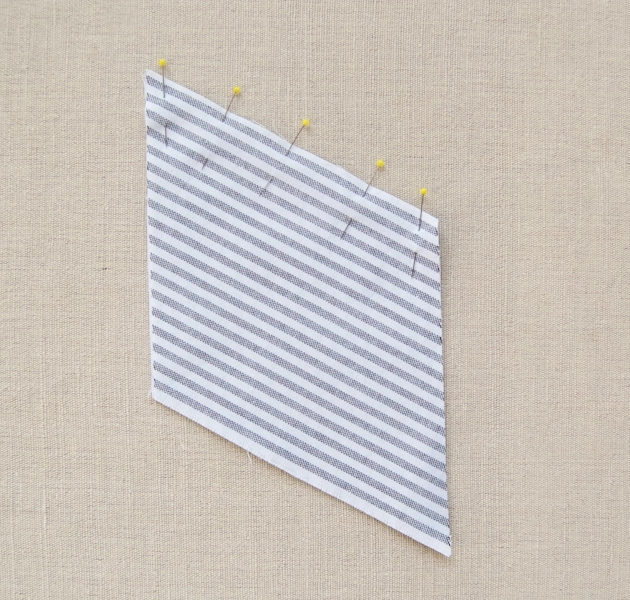
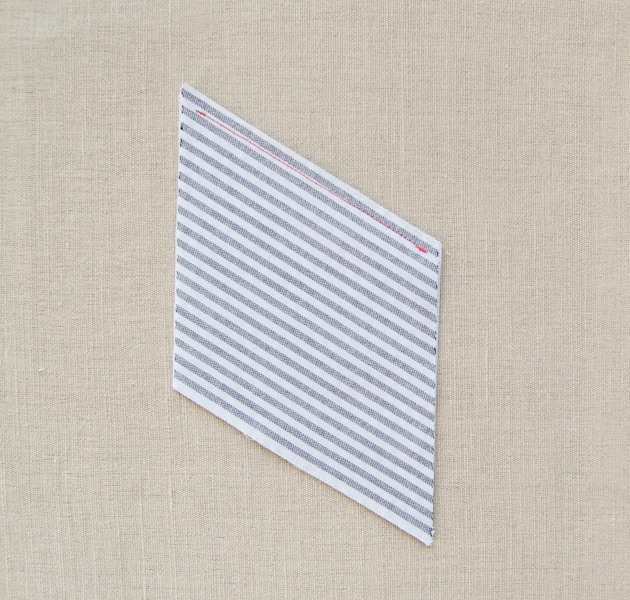
Sew the two pieces together along the pinned side, starting and stopping exactly at the Corner Points and backstitching at the beginning and end of the seam. It is important that you do not sew beyond the Corner Points. In the process of piecing this quilt top, you will never sew beyond the Corner Points into the seam allowances and you will always backstitch. (Please note that this is different than normal machine piecing where you don’t backstitch or stop before the end of the piece.)

Seam 2
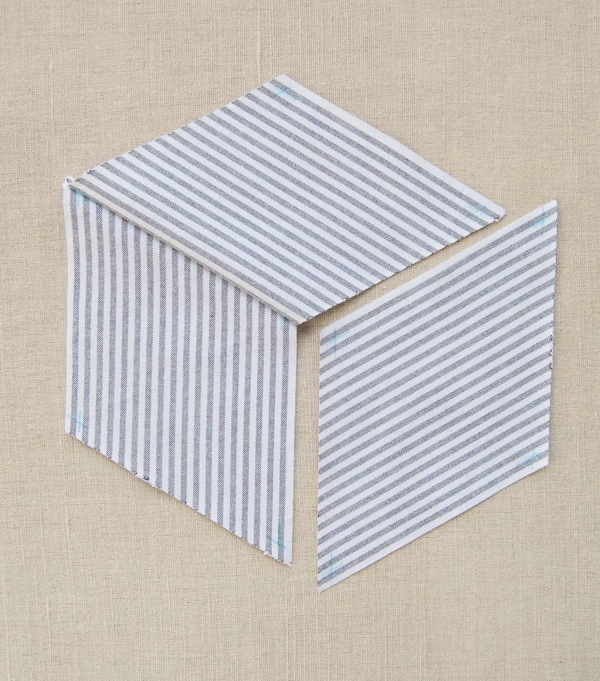
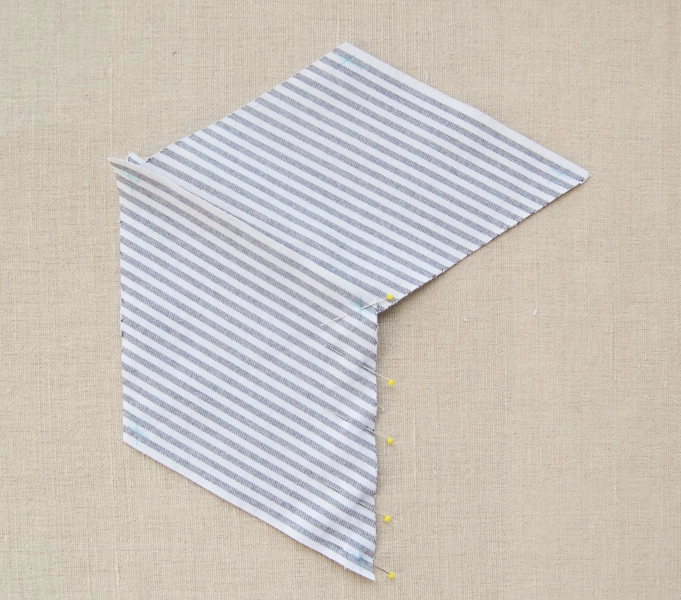
Place Piece B on top of Piece C, right sides together. Pin the two edges together as described for Seam 1, first pinning through the Corner Points and then pinning in between.

Sew this pinned side together in the same way you did Seam 1, starting and stopping precisely at the Corner Points, backstitching at the beginning and end of each seam, and being very careful to not sew into the seam allowances of any of the pieces.
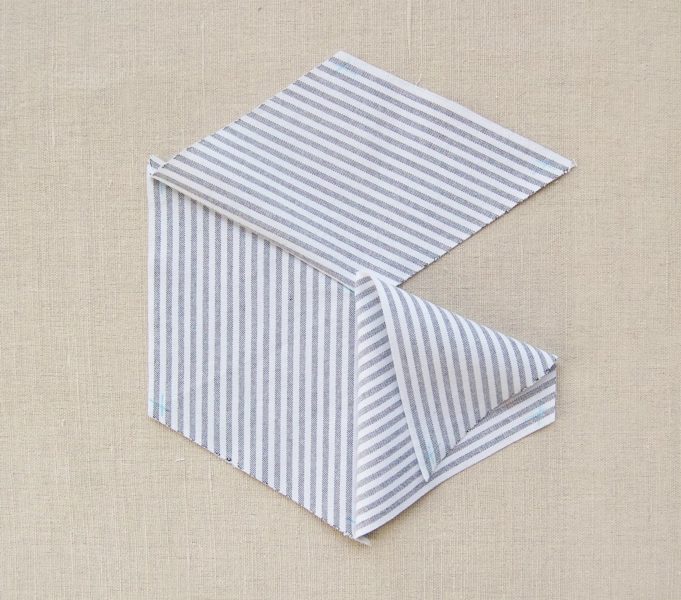
You will really see the Full Tumbling Block coming together now, with just one more seam left to sew: the top edge of Piece C and the bottom right edge of Piece A.

Pin these two edges together in the same manner as for Seams 1 and 2 . Pull Piece B away from Pieces A and C so that it doesn’t accidentally get pinned as well.

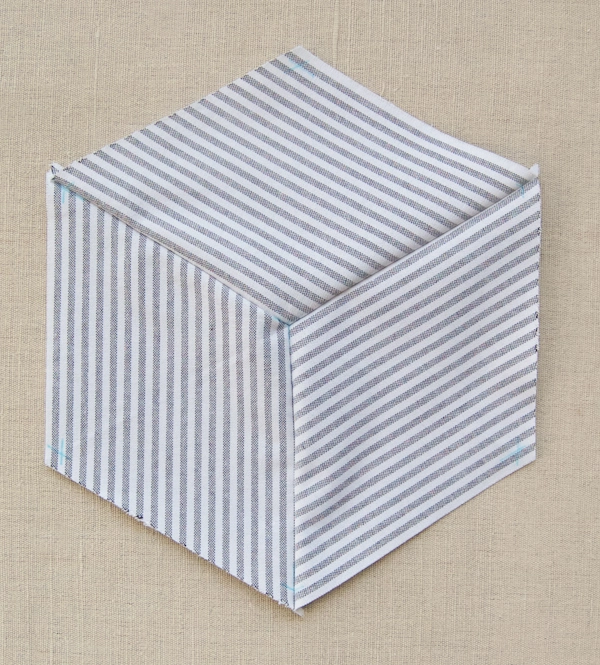
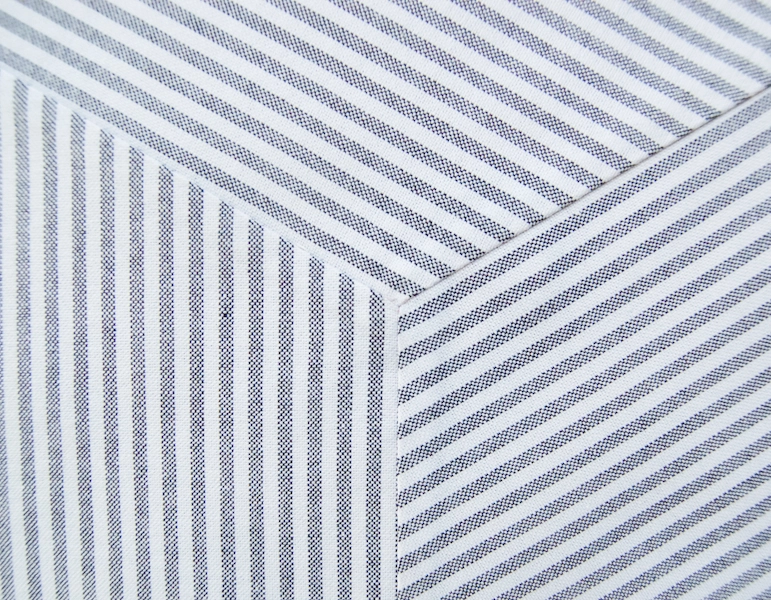
Create 27 Full Tumbling Blocks by working through the steps of Seams 1, 2 and 3. While you can’t chain piece these blocks together in the traditional sense, you can make this process a bit quicker by creating an assembly line: pin all the pieces for Seam 1, then sew them all; pin, then sew, for Seam 2; pin, then sew, for Seam 3.
Make Partial Tumbling Blocks
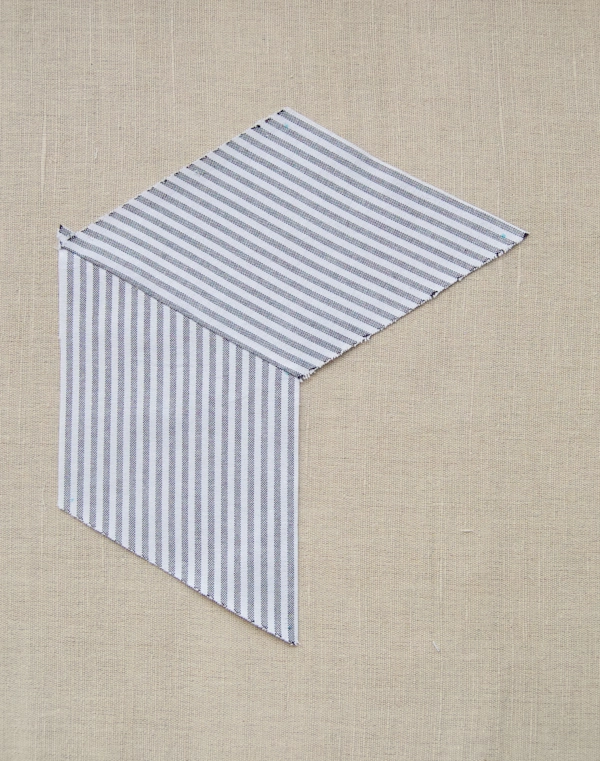
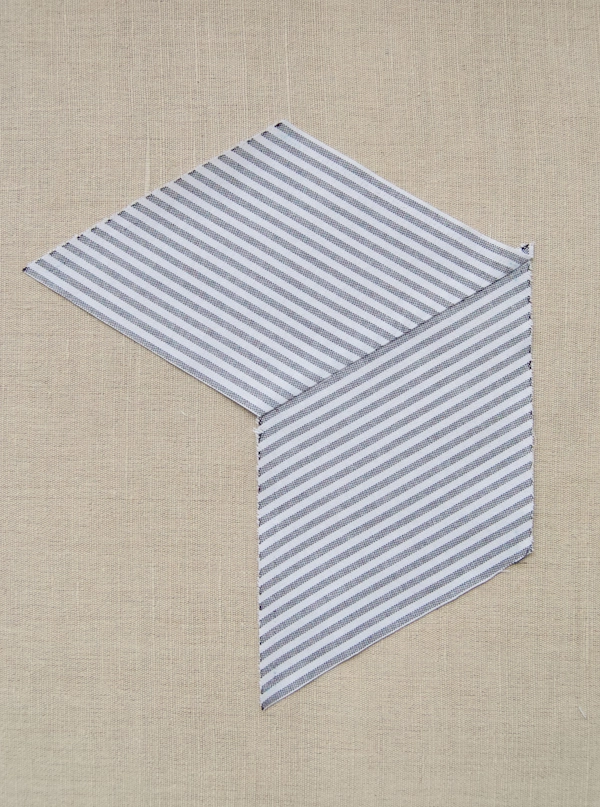
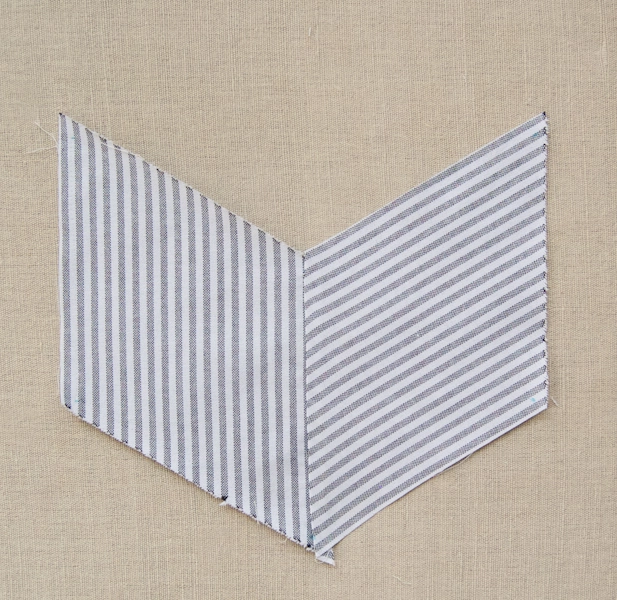
Sew the Rows
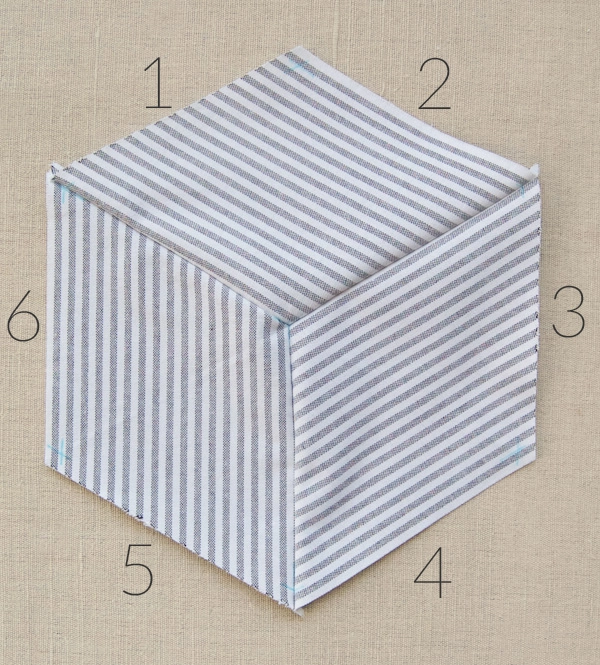
In order to communicate clearly, I’ve assigned each side of the Full Tumbling Block a number, as shown above. Please refer to these numbers as you sew the rows.
Rows 1, 3, and 5
Gather five Full Tumbling Blocks and sew them into a horizontal row by sewing Side 6 of a right-hand block to Side 3 of a left-hand block. Pin and piece them the same way you have done all of the other seams: pin through the Corner Points, backstitchat the beginning of the end of each seam, and only sew exactly from one Corner Point to another, making sure you don’t sew into the seam allowances.
Repeat this two more times so you have three rows of five Full Tumbling Blocks each. These are Rows 1, 3, and 5.
Rows 2, 4, and 6

Begin the next horizontal row with a Right Partial Tumbling Block and piece its right-hand side to Side 6 of a Full Tumbling Block. Continue the row by piecing three more Full Tumbling Blocks to Side 3 of each previous block.

This row has 6 total pieces. From left to right, they are a Right Partial Tumbling Block, 4 Full Tumbling Blocks, and a Left Partial Tumbling Block.

Now, lay a rotary cutting ruler along the vertical edge of the Left Partial Tumbling Block, and using the rotary cutter, cut Piece A in half lengthwise to make its edge flush with Piece B. It is now a Half Tumbling Block.
Repeat this for the Right Partial Tumbling Block at the opposite end of the horizontal row.
Repeat both steps also for the two other rows you just made. These three rows are Rows 2, 4, and 6.
Piece the Rows Together

You will now begin to pin and sew Rows 1 and 2 together. They fit together in a zigzag, as shown above. Row 1 starts and ends with a full Tumbling Block. Row 2 starts and ends with a Half Tumbling Block.
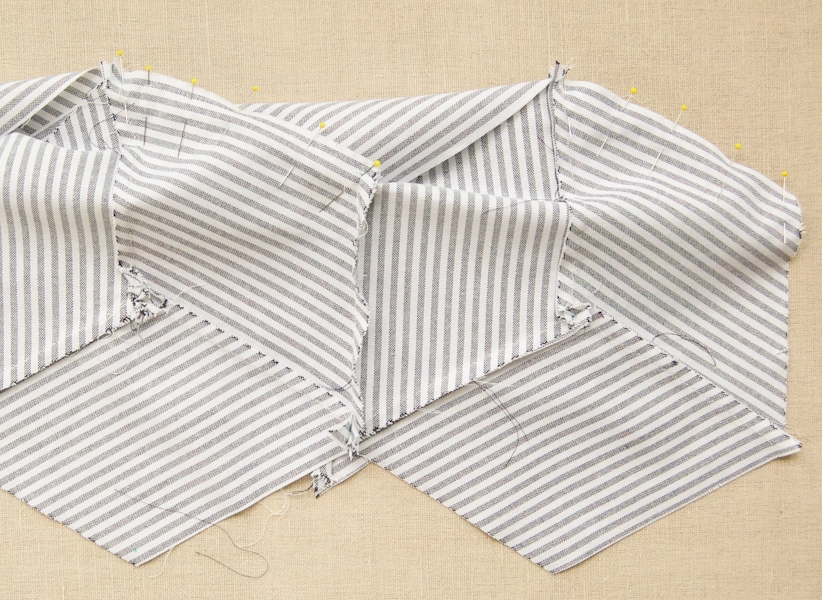
Place Row 1 on top of Row 2, right sides together. Pin, as you have been pinning, all of the Side 4’s of Row 1 to all of the Side 1’s of Row 2. The pinned together Rows will get a little twisted, as shown above.

When you look at the right side of the two partially sewn rows it should look like the photo above, with only half the connecting edges sewn.
Fold Row 1 over so that the right sides of the rows are facing each other, and this time, pin the Side 5’s of Row 1 to the Side 2’s of Row 2. Sew these pinned edges together.

In this manner, sew together all six of the rows in numerical order.
The left and right sides will be straight, and the top and bottom will have a zigzagged edge.
Finish the Top
Straighten the Top Edge
Orient a Bottom Partial Tumbling Block so it is in the shape of a “V.” Pin and sew its bottom edges to a concave 120-degree angle at the top edge of the quilt top.
Repeat this for the 4 other concave 120-degree angles along the top.
Lay a rotary cutting ruler horizontally along the top edge of the quilt top. Align the top edge of the ruler precisely ¼ inch above the top corner of Row 1’s Full Tumbling Blocks. Use a rotary cutter to trim along the top edge of the ruler.
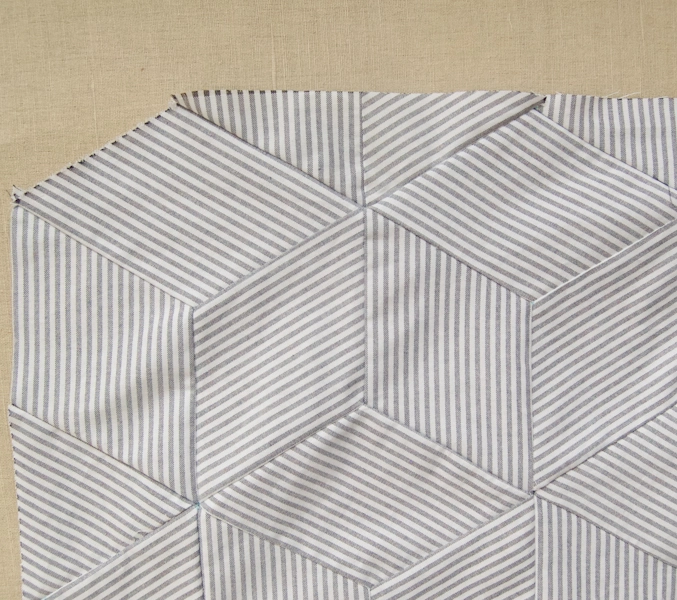

Sew the bottom edge of a Piece C to the top left corner. 

Cut off the top of this piece to align with the top edge of the quilt.

Sew the bottom edge of a Piece B to the top right corner. 

Cut off the top of this piece to align with the top edge of the quilt.
Straighten the Bottom Edge

Sew a Piece A to each of bottom edge’s convex 120-degree angles. First sew Piece A’s top left side to Side 3 of the left-hand Full Tumbling Block. Then sew Piece A’s top right side to Side 5 of the right-hand Full Tumbling Block.
Line up the rotary cutting ruler horizontally so that its edge is ¼ inch below the bottom corner of Row 6’s Tumbling Blocks, and trim Piece A.
Repeat for the 4 remaining convex sections along the bottom edge.
You are now done piecing the quilt top. It should be a nice, trim rectangle!
Press the Seam Allowances
Turn the quilt top so that the back side, with all of the seam allowances, is facing up.

On the back you will be focusing on the areas where six pieces all come together, like the center of a 6-pointed star. Press the seams clockwise around the each of these 6-piece intersections.
Once you do this, flip the quilt top so that the front is facing up. Press the top flat, while keeping the back seams arranged in this manner.
Baste
Baste the quilt to prepare it for quilting. If you’ve never done this, please check out our Pin Basting Tutorial. (When you make the quilt sandwich, you will have to trim down the batting after you lay it on top of the backing and before you place the quilt top on it.)
Quilt
You can quilt in any pattern you like, as long as there are quilting stitches no less than 8 inches apart. We chose to “stitch in the ditch” for our quilt, sewing along all of the seams. Here’s how we did it…
Use your machine’s walking foot and sew right beside the seam on the side without the seam allowances pressed under it, in this order…

Start by sewing a horizontal zigzagged line across the top of Row 4, moving left to right. The gray arrows, above, represent this line of quilting.
Next, moving from right to left, quilt along the zigzagged line right below the previous line. The pink arrows, above, represent this line of quilting.
Repeat this process, reversing direction for each zigzagged horizontal row. First work the zigzagged rows below Row 4, then work the rows above Row 4.
After you have quilted all of the zigzagged lines, quilt along the vertical lines, represented by the blue arrows above. Start quilting the vertical lines at the bottom of Row 4, working first the bottom half of the quilt, then the top half. Alternate directions for each line of quilting, and be sure to backstitch at the beginning and end of each seam. Always try to quilt on the side of the seam without the seam allowance, which means a slight shift as you pass through each 6-point intersection.
When you are done quilting trim the batting and Backing along all four sides so that they align with the Quilt Top.
Bind
Use the Binding Strips to bind the Quilt with double fold binding. For instructions on how to do this, please check out our Making Double Fold Binding Tutorial, and then our Sewing on Double Fold Binding Tutorial!

Similar Posts You Might Enjoy:
Original article and pictures take www.purlsoho.com site


Комментариев нет:
Отправить комментарий