Shading with Wood Stain is SUCH a fun and unique way to create beautiful art on furniture… or anything that's wood! (click here to see how I came up with this technique, and the variety of different pieces I've done!) In this post I'm going to share a simple tutorial for the beginner. Let's get started!
If you missed Part 1 of our Buffet Transformation, click here to read about how we rescued this buffet from a burn pile… stripped, sanded, repaired, primed, and painted!

Next is the fun part. You may not know this about me, but I love to draw with charcoal. I love the shading, and the instant gratification of seeing a masterpiece unfold before your eyes. I can’t draw a person to save my life… but I can shade, yo!
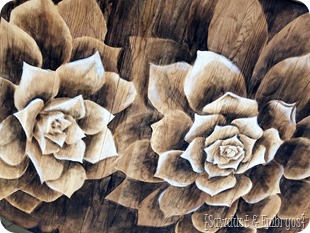
I get an inordinate amount of joy from coming up with new ways to make furniture (or a room) unique and beautiful. And I started thinking about how, in theory, you should be able to get the same charcoal shading effect using STAIN on wood. I was realllllllly excited to give this a try! Using this as inspiration for a flower design, I drew out some flower petals lightly with a pencil on the top surface of the buffet. Can you see it?

If you’ve ever stained something before, you know that the longer you leave stain on the wood, the darker the finish will be when you wipe it off. We used the darkest POSSIBLE stain we could find so we would have the most contrast.
With that in mind, I started with the center petals and stained each petal, starting at the center and working my way out toward the tip of the petal using this stain (my fave for this technique!).
UPDATE! Since doing this first piece of furniture, I've found that applying the stain with a cloth over your finger gives a much cleaner line than the paint brush. Check out my video tutorial for even more details!

lightest portion of my ‘shading’. Using a dry cloth and my finger, I wiped away from the stain to allow a smooth transition from the stained portion to the outer unstained portion of my petal…. rubbing it to create that shaded look.


By the time I got all the way around the center petals (about 5 minutes), I figured it was time I could go back around and wipe off a little more stain on each petal, allowing the stain to gradually get darker toward the center.
I continued to repeat this process on each petal as I worked my way away from the center of the flower.

This next photo is for those of you that think my house is always clean, and that I’m always dressed in something cute. In fact, the pic below (of me in my pajamas) has been pinned over 250,000 times on Pinterest. #dying

Every 5 minutes or so, I would go back to wipe off a little more from the previous petals.

Once I had worked my way all the way out to the edges, staining every petal using my graduated tinting technique, I finally wiped off the remaining darkest stain on the inner part of each petal.

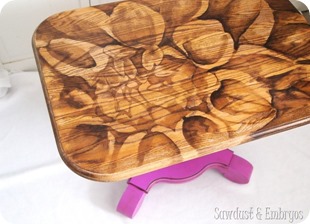
Then, the whole piece got a thick glossy coat of poly (I use this poly). I wish I had taken ‘after pictures’ before I polyed, because the glare from that glossy finish makes the design not appear to POP as much in pictures.

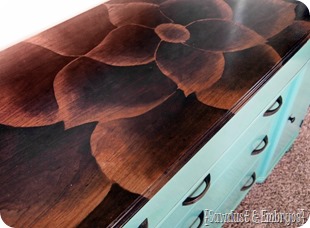
It’s like a legit piece of artwork. I’m in total shock that this technique has never been done before… because it’s SO easy, and has such a dramatically beautiful effect. I’m pretty stinkin’ proud of myself for coming up with this one!

And I love the creamy green color of the body too! And the way the stained flower petals wrap around the edges of the top surface.

Are you so inspired? I hope so! You should absolutely try this technique! And send us pictures when you’re done! >> beth@realitydaydream.com

I’d say this is a pretty epic story of ‘Rags to Riches’, when it comes to this buffet that was tossed into a burn pile. I’m so glad we rescued it and gave it new life! You can just barely tell where the burning had taken place on that corner. But you wouldn’t notice it unless we pointed it out!

We hope you’ll have the confidence to give this a try yourself! The following is a video tutorial with even more step-by-step instruction!
.
.
.
For simple instructions on stripping a surface down to the raw wood (in preparation for this staining technique!)… click here!
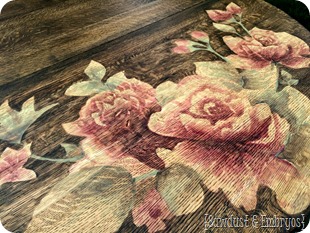
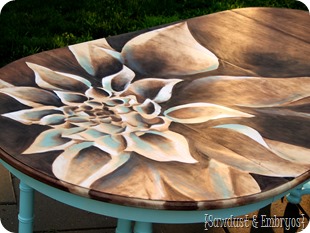
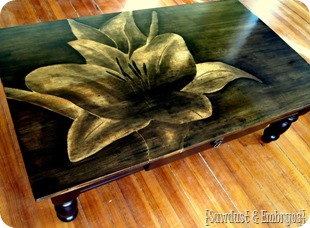
UPDATE! Since writing this post, we've done this technique many more times and have some beautiful artwork to show for it (click here)! It truly is easier than it looks! Click each pic below to be directed to that post. We also have a video tutorial coming soon, so be sure to subscribe to our blog so you get updates each time I publish a new post!
And feel free to ask questions in the comment section. I'm usually pretty good at responding quickly! BE INSPIRED!
(below are pics of more stained pieces I've done… in no particular order. Click the image to be taken to that post!)

*this post contains affiliate links
Original article and pictures take realitydaydream.com site
Комментариев нет:
Отправить комментарий