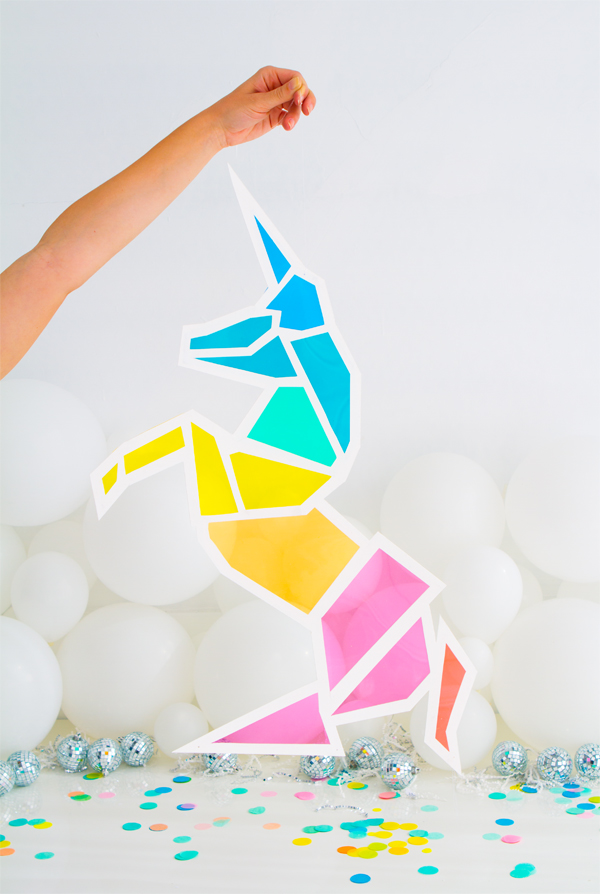
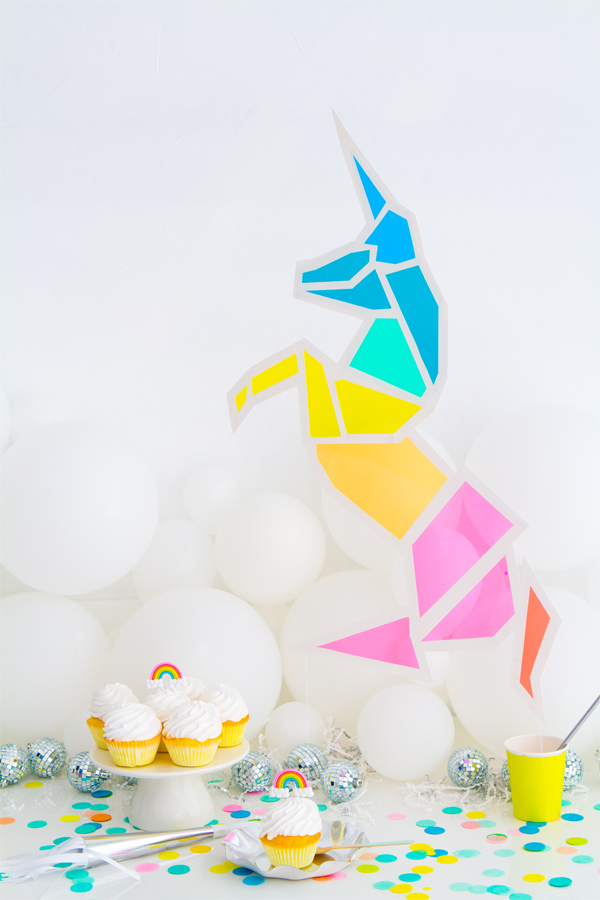
Is there a National Unicorn Day? If not, this is clearly an oversight. If there can exist a ‘Be Bald and Be Free” day (yep), SURELY we can reserve a mere 24 hours for the most beloved and magical creatures this world has never actually seen.
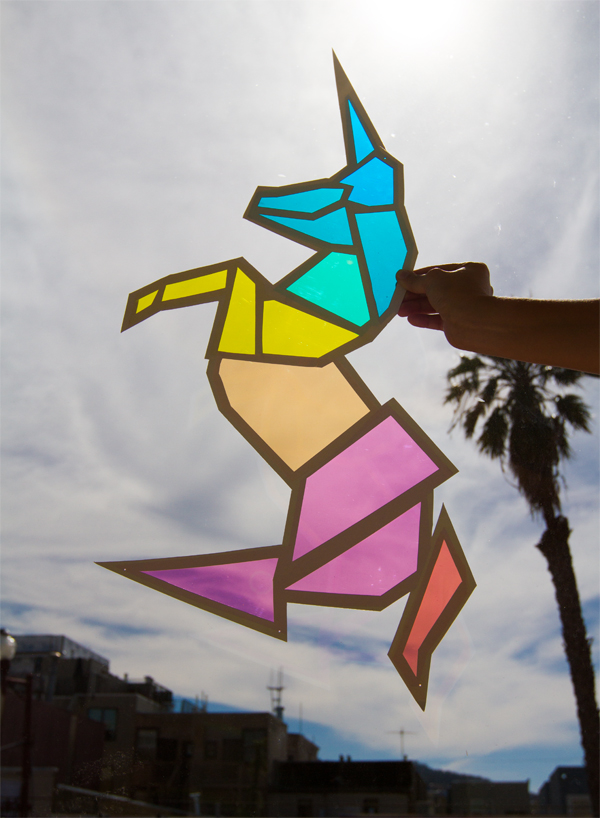
Recently I stumbled across these amazing (and affordable!) colorful gel filters and started daydreaming about all the crafting possibilities! They’re much sturdier than cellophane so you also get a lot less creases (and headaches). I came up with this ‘stained glass’ version of a Unicorn (based on the design from this project) which would make an eye-popping installation for a Unicorn themed party- or even just some cute decor to hang at your window and make you smile!
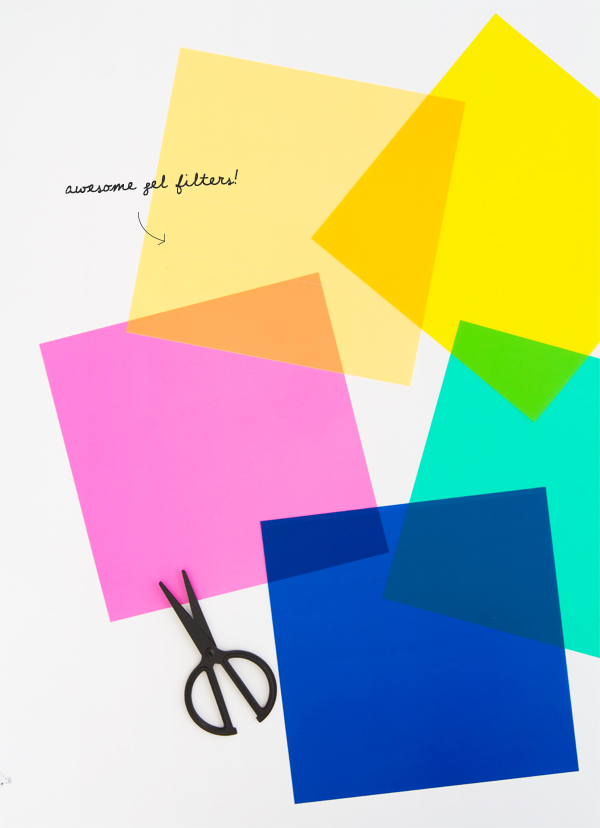
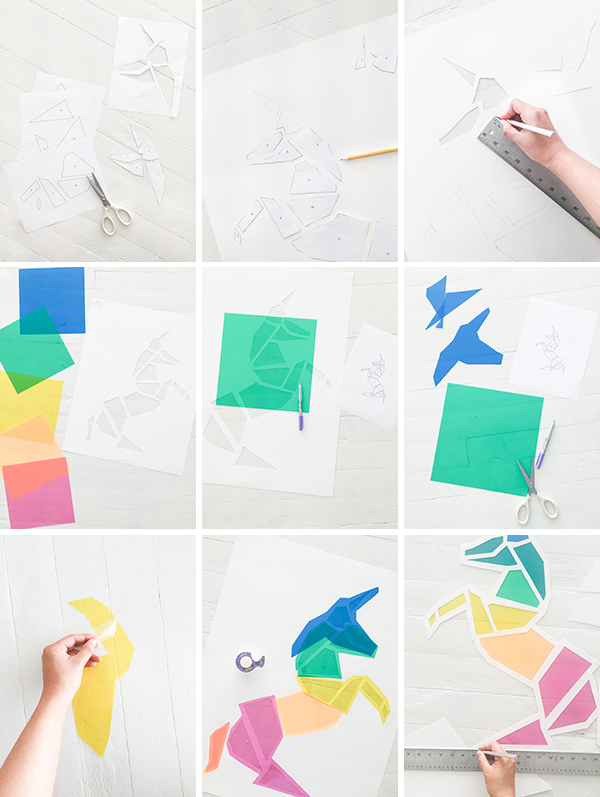
Materials Needed: Printable unicorn template, printer and paper, 22” x 28” white posterboard, scissors, pencil, eraser, x-acto knife, ruler, colorful acetate gels, sharpie, clear tape, hole punch, string
Step 1: Print the unicorn template and cut out each piece.
Step 2: Using the numbers and template guide, lay the pieces out on the white posterboard. Make sure to leave at least a half inch of space between each piece.
Step 3: Lightly trace the outline of each piece onto the posterboard in pencil.
Step 4: Using an x-acto knife and ruler, cut along the traced outlines.
Step 5: Flip the posterboard over.
Step 6: Place the light blue acetate sheet over shapes 1, 2, 3, and 4. Leaving a 1/4″ to 1/2″ margin around the edge, trace an outline of the combined shape of 1, 2, 3, and 4 on the light blue acetate and carefully cut out with a pair of scissors.
Step 7: Repeat step 6 with the other colors. On the green acetate, trace an outline of the combined shape of pieces 3, 4, 5, and 6. On the yellow, trace an outline of 7, 8, 9 and 10; make a separate outline of 15. On the orange sheet, trace an outline of 11. And on pink, trace an outline of the combined shape of 12, 13, 14, and 15. Cut the pieces out.
Step 8: Remove the film from all of the acetate sheets. You can use tape to pull the film away from the acetate if you need a little help!
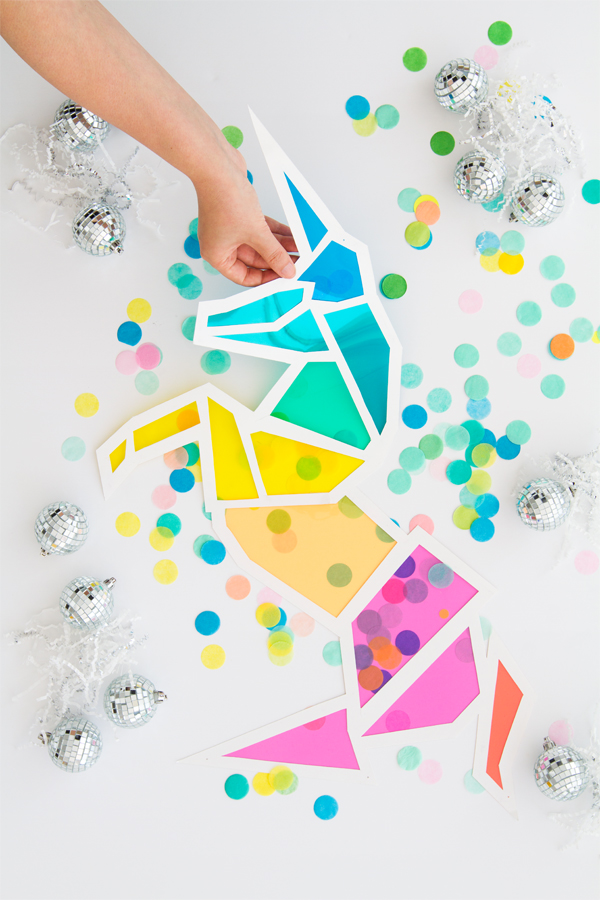
Step 9: Arrange the shapes on the backside of the posterboard (some of the pieces overlap to create new colors).
Step 10: Carefully tape the acetate to the posterboard, making sure that the tape doesn’t show through the openings.
Step 11: Cut out the unicorn, leaving a border between 3/4″ and 1” around the edges.
Step 12: Punch a hole at the top, thread some string, and hang up beside a window to enjoy!
Original article and pictures take ohhappyday.com site
Комментариев нет:
Отправить комментарий