среда, 28 марта 2018 г.

#86 – Build something from wood

#86 – Build something from wood
EJS_7251

Task #86 of my 101 Things in 1001 Days project: build something from wood.


When I added this task to my 101 Things project I assumed it would involve hammering one piece of wood onto another. I didn’t really have an idea in mind, but I was pretty sure that during the course of this 1001 days I’d dream up something simple. Simplicity was key because we don’t have much in the way of tools – just a handsaw, hammer, an electric sander, a drill and some nails and screws. And plus, I have no idea what I’m doing most of the time.


My phone contract expired last month and I used it as an opportunity to leave my terrible phone provider and sign up with a new one. I decided to sign up for a plan that included an iPhone 5 and every day since then I’ve quietly congratulated myself. It’s such an elegant little device and the camera alone is a great reason to upgrade.


My only complaint is that the lightning cable for the iPhone 5 renders my two old iphone docks completely useless. It was during my online search for a replacement that I discovered a bunch of beautiful wooden iphone docks, and thought to myself I wonder if I could do that?


EJS_7222

EJS_7220

Tim and I found an old section of tree trunk a couple of weeks ago on the side of the road, and it wasn’t much to look at. The bark had already begun to rot away and a few spiders had taken up residence. I had a feeling that underneath the muck there was going to be a beautiful piece of wood inside, and I was right! I don’t know what sort of wood it is (some sort of Australian hardwood I guess), but it’s pretty.


I improvised like crazy to build this iphone dock, so it didn’t make sense to take step-by-step photos. But if you came here to learn how to make a wooden iphone dock these tips might help.


WHAT I USED:


  • A piece of wood
  • Lightning cable
  • Dremel or rotary hand tool (mine was $40)
  • Hot glue gun
  • Drill
  • Cabinet makers’ wax
  • Thick, self-adhesive felt base (this is what I used)

EJS_7214

EJS_7204

HOW I DID IT:


  • I chose a section of wood that looked interesting, and used my hand saw to cut off the slice I needed. This would have been much easier with a circular saw!

  • I sanded both sides of the wood slice, starting with a course 40-grit sandpaper and then using progressively finer grits (up to 120-grit). If you like a mirror finish you might want to choose something even finer to finish it off. I opted for a more natural look to suit the rough edges and those beautiful deep cracks.

  • The rotary tool (or dremel) that I chose came with all the accessories I needed, and I switched between attachments pretty regularly. I found that I mostly wanted to use the stone grinding shanks that came in my kit (here are some similar ones) even though I don’t think they’re intended for wood. If your wood is softer you might be able to use something more gentle.

wip1

  • I started to carve out the recess for the phone by eyeballing it, and as I got closer to the finish line I drew some pencil guidelines to make sure that it was even. My asymmetrical slice of wood was very forgiving and meant that I didn’t have to do any measuring. I chose to carve a generous recess to allow for different phone cases in the future. And really, the recess is a cosmetic feature rather than a practical one – my dock doesn’t provide any support to the phone except via the strength of the lightning cable head.

  • I spent quite a lot of time smoothing the groove and buffing the wood with the cabinet makers’ wax at this point – including the beautiful, rough edges. Then I went to bed and had nightmares about ruining my project with the drilling step.

wip2

  • The next day I drilled a hole in the centre of the recessed groove, and gave it a slight lean so that the phone would sit at a bit of an angle for ease of viewing. I used a 9/32″ drill bit for the hole, which was perfect for the head of the lightning cable to fit through. It worked!

  • The next step was to use the dremel to carve out a path for the rest of the cable on the underside of the dock. I knew that this was going to be covered with a layer of felt so I didn’t worry about making it beautiful. I carved a deep groove that would allow the dock to sit perfectly flat.

  • Then it was time to heat up the hot glue gun. I spent some time deciding how much of the lightning cable I wanted poking out of the dock and testing it thoroughly with my phone. I also came up with a strategy for setting the cable in place, since I knew I would only have a few seconds to place it once I’d added glue. Spend some time making sure that the head faces forward perfectly, and also that it doesn’t lean left or right. Then go – and don’t burn your fingers!

  • Fill the remaining gaps in the hole with hot glue, and when it’s cool flip it over and do the same at the bottom.

  • My last step was to apply a layer of thick, self-adhesive wool felt on the base. It’s designed to protect the surface that your dock will sit on, but also serves to hide messy cables and keep your dock perfectly flat.

EJS_7237

You know, I think I might have been too intimidated to begin this project if I’d seen all of these steps spelled out for me at the start. So let me try that again:


Carve a spot for your phone to sit in. Smooth, polish or stain your wood to your heart’s content. Drill a hole for the cable, and glue it in place so that it won’t budge. Flatten the base somehow. Add the pretty wooden bunny from Japan that your mum found for you last year. Enjoy!


Original article and pictures take scarletwords.com site

#DIY Easy Framed Art

#DIY Easy Framed Art
Easy #DIY Framed Art | Lonny.com
(Photos © Steph Hung)

Given how expensive custom art is, it's easy to understand why anyone might want to play graphic designer in her spare time. How better to create a personalized masterpiece without paying a small fortune? Thankfully, crafter—and D.I.Y extraordinaire—Steph Hung whipped up this easy, affordable project just for Lonny. Made with little more than vellum and your favorite gift wrap (or poster, or wallpaper, or whatever!), this framed art helps subtly ring in the new season—and bid adieu to the old one.


Easy #DIY Framed Art | Lonny.com

MATERIALS

-- gift wrap, poster, or image

-- design template (or design your own!)

-- cutting mat

-- X-acto knife

-- vellum

-- ruler

-- frame (optional)


Easy #DIY Framed Art | Lonny.com

INSTRUCTIONS

1. To create the template, place your printed design on a cutting mat; cut out with the X-acto knife.

2. Lay design template over vellum.

3. Carefully cut out design.

4. Lay vellum over gift wrap; cut and trim to size using the ruler.

5. Frame if desired.


Easy #DIY Framed Art | Lonny.com


Original article and pictures take www.lonny.com site

$20 DIY Pallet Wall

$20 DIY Pallet Wall

We finished the pallet wall, whoop whop! Can I get a “heck yes”?


Last time we checked in we’d left you with this. And last time we did a walkthrough in the living room it was looking pretty sad, like this:


Solution. Pallet wall!

Before we get into the details I’ll show off the good stuff, the after pics! I can hardly contain my excitement for this project. It’s possibly my favorite to date. Which says a lot over our recent kitchen makeover and Zoey’s original nursery, both tied for first in my imaginary ranking system.


Here she is!


Pallet Wall via Cape27Blog

So, if you’re a pretty close follower, then you’re probably wondering where everything else in the room came from. I wasn’t kidding when I said I had at least a handful of projects going on. Stay tuned, as we’ll be covering those throughout the rest of this week!


Now, back to the pallet wall. Oh. My. Gosh. I am drooling over it. I could NEVER have imagined it would turn out so well. Props to my hubs. He’s the man.


DIY Pallet Wall via Cape27Blog

As for how we did it. First up, finding pallets. Several retailers have hundreds of leftover pallets on a daily basis. Think home improvements stores, Lowes, Home Depot, even Ikea had them available. And for free! Do not, I repeat, do not pay for pallets. I would advise to be careful, as far as where you get them from though. You never know what they’ve carried in the past, and they could be crawling with nasty pesticides etc. A deep, deep clean is advised. We were lucky enough to get them from the hubs workplace. They get shipments in daily, and we were able to fish through them and find the best pieces.


Pallet Wall via Cape27Blog

Once you have the pallets on hand it’s time to start disassembling. I’ve had several requests for tips and tricks on the easiest, most efficient way to go about this. Spoiler alert. There is no easy route. This part is a pain, and at most times, a two person job. But don’t get discouraged, once you make it through, you’re in the clear. Everything else is smooth sailing.


We first tried using a pry bar to pull apart the boards. Seven seconds in we realized that was an epic fail and went straight for the sawzall. We wedged the blade in between the boards and cut through the nails individually. Throughout most of the cuts, I held the pallets in place while Rick worked his way through with the sawzall. It was not a short process, but not entirely difficult either. Just time consuming. And in case anyone is curious, we used around 70 pieces of pallet wood and eight actual pallets total.


Pallet Wall via Cape27Blog

Once the pallets were separated, we used an orbital sander with 80 grit sand paper. Rick was careful just to smooth the exposed edges and clean them up a bit, and not to sand away the distressed look that we loved so much. And although we were pretty confident in where the pallets had come from, we used a cleaning solution on them just in case.


On to staining. We shared a few of our inspiration pics last week, and after reading a few tutorials from others, we learned that most others chose to install the wood as is. Which is great. If you’re pallets are “pretty”. Ours however, came in array of wood types and a lot of them, although still distressed, were fairly new. Meaning that they were still a light wood that hadn’t yet been exposed to the weathering conditions. Point of the story, we chose to stain ours. We loved the look of varying woods, but we also wanted the uniform of one stain color that would bring all of the wood into the same color tone. This was the BEST decision made.


Pallet Wall via Cape27Blog

We used Minwax’s “Special Walnut”, applied lightly (very important, as pallet will soak up stain like nobody’s business) with a rag. Don’t worry if the stain isn’t going on evenly, this only adds to the distressed look once installed on the wall. These pieces actually wound up being a few of our favorites. Also, make sure that you stain the edges of the wood if they’re drastically different in color, as they may show a bit if the pieces sit unevenly… and they will.


We left the stained wood outside to dry and air out for a few days before moving on to installation. Surprisingly, the actual install took us the least amount of time. We knocked it out in two evenings with two kids in tow and an 8 o’clock bedtime. Not bad.


(sorry for the poor picture quality, we had to take this one at night)

Start by finding and marking all of your wall studs, for nailing the wood pieces in place. We’ve seen others used plywood behind the pallet wood, but we chose to go straight into the wall. Yes, this will be less than pleasing to remove and may result in completely replacing the drywall if the time ever comes that we grow tired of the wall. We’re willing to take the chance, and unfortunately becoming far to familiar with the ins and outs of hanging drywall. We’re much happier with a little extra work down the road, and for one main reason that we might as well get into.


Unlike most other DIY pallet walls, our wall is not surrounded by two adjacent walls. The left side is an open corner. We decided to “frame” the vertical sides of the wall to cover any exposed edges on the horizontal pieces. We weren’t originally thrilled with idea, but turns out, we LOVE it. Love. It gives the wall an extra finished look. But, with the open corner comes a side view, and extra plywood would only add to the thickness of the wall. Not so good on the eyes. Anyway, completely your decision.


Once the studs were marked, we began electric work. We used “add a depth liners” to extend the outlets from the wall and accommodate the plank wood. As you may know, Rick is an electrician. And that may or may not have a play in the advice I’m about to give. Regardless, unless you are highly experienced in electric and know exactly what you’re doing, I would not under any circumstances mess with it. After remodeling two homes of our own, and seeing several others (friends, family, and customers) it is amazing what people come up with. And incredibly scary. Please, please, please. Ask for help or hire someone. The consequences outweigh any money you may save by doing it yourself. Enough on that, lets build this wall!


Side note: All of those holes are a result of my husband being “too lazy” (his quote) to get into the attic to run the television wires to a new location. And “A hammer was easier, especially on a wall that is going to be filled with nail holes anyway.” Love his honesty.

Here are a few tips that we compiled as we went:


– Start at the top of the wall, not the bottom. If you have to trim the last few pieces to fit, it’s better that they sit at floor level where they’ll be less noticeable and possibly covered up completely.


– Think of the wood placement and sizes as you would a hardwood floor install. Random is key. That goes for color too!


– Organize your wood pieces by width and don’t begin a row until you’re sure that you have enough of the same width pieces to complete it.


– Check for gaps and level placement as you go, but don’t obsess over it. The wood pieces aren’t brand new straight cuts and perfection is not the goal. Ours actually ended up at a half inch difference from one end to the other. Which bothers Rick more than he likes to admit


Finished product!


Pallet Wall via Cape27Blog

We used pallet wood for the trim pieces as well, but like I said, if you don’t have an open corner there’s no reason for trim. The piece on the right is solely for aesthetics to compliment the right side. We also chose to keep the white baseboards and white cove ceiling exposed. Although, there really was no way of working around the cove if we’d wanted to.


It’s hard to capture in pictures, but we love the detail in the varying depth of the wood.

And as for a cost breakdown, we’re looking at just under $20! (an $11 pack of 2 inch nails and $8 worth of stain)

Now, brace yourself for a week of DIY projects that can’t possibly produce posts as lengthy as this one.


Your turn! Anyone else gearing up to tackle a plank wall of their own? Could this be the new wood paneling that is doomed to go out of style within the next 10 years? Lets hope not!


Original article and pictures take www.cape27blog.com site

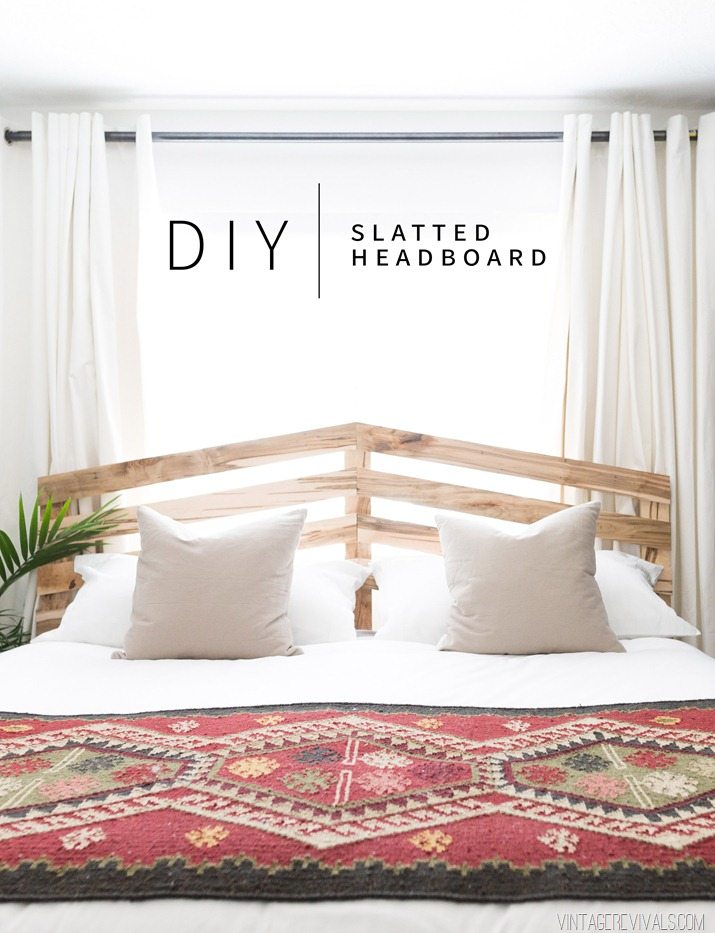
$70 DIY Slatted Headboard

$70 DIY Slatted Headboard

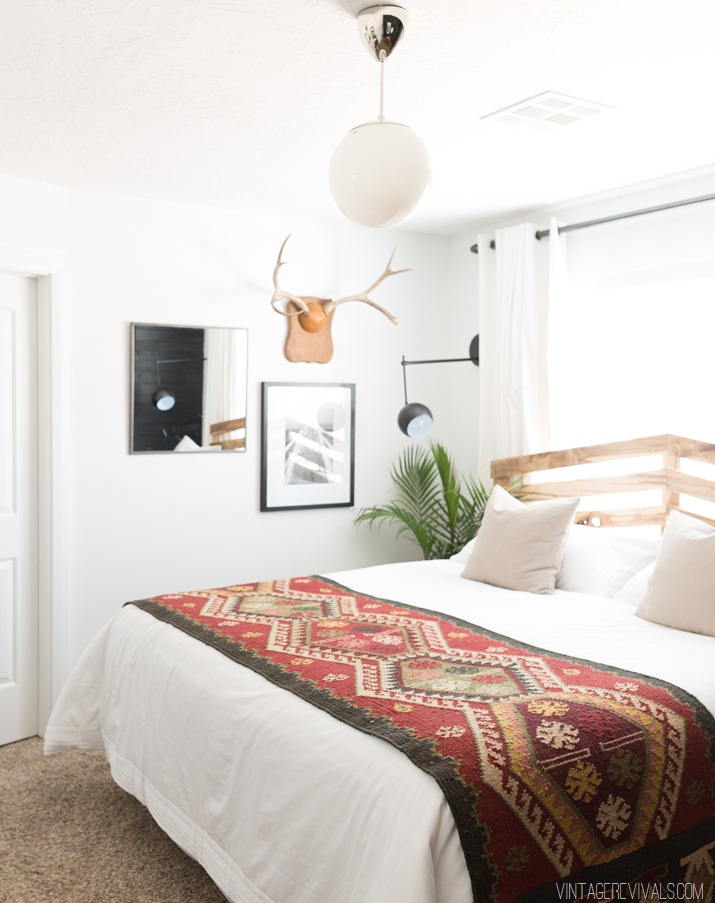
If you’ve been following along with Tyler’s Scandi Sanctuary Makeover you are well versed in the dilemmas that I faced with the design. The biggest one being the bed and the fact that it had to live in front of the window. This made headboarding (i just made that word up) a little bit harder because 1. It couldnt block the light. 2. It had to be strong enough that the bed could be pulled off of the wall and the headboard could still be leaned against. And 3. It couldnt cost a million dollars but it needed to look like a million bucks. Simple.


DIY $70 Slatted Headboard

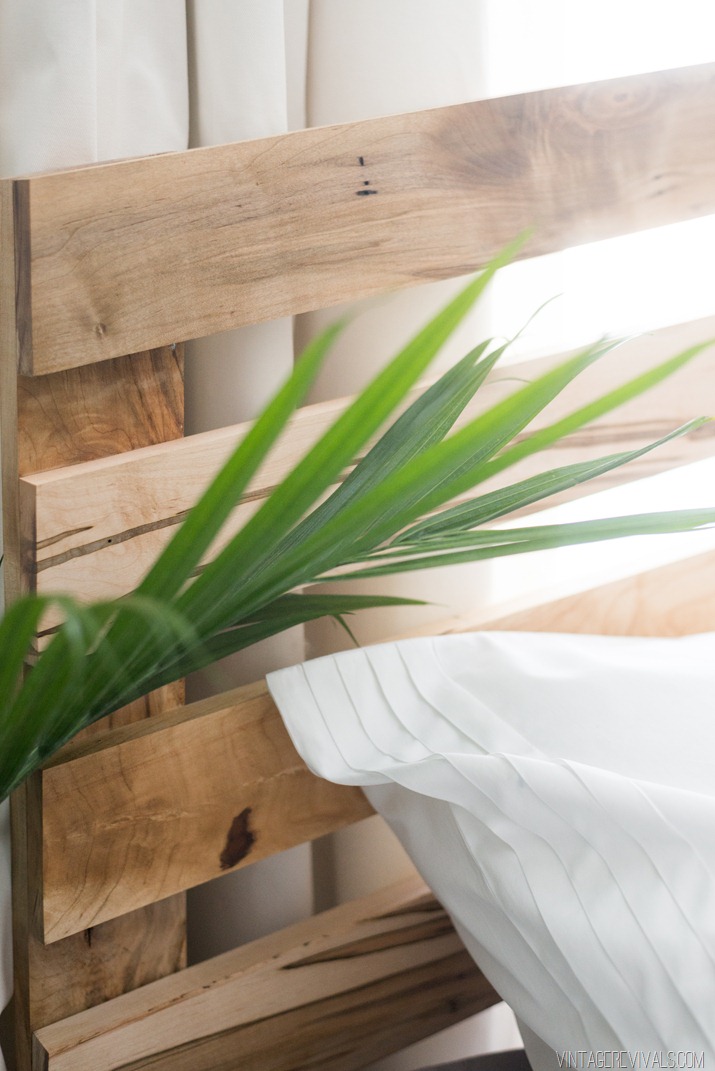
The first step in this journey was to find some seriously amazing wood to build with. Pine from Home D just wasnt going to do, so I ventured into the unknown world of the lumber yard and bought some gorgeous Maple. This type of wood has a few different names (possibly depending on where you are in the country?) I’ve heard it called Wormy Maple, Colorful Maple, Ambrosia Maple. Fun fact, the wood itself doesnt grow this way. Its a regular maple tree that becomes infested with Ambrosia Beetles that burrow into the wood and bring bacteria that stains it. Pretty sweet right?


First things first, when you’re building this headboard you first have to decide how tall you want it to be. Seems a little obvious but just go with me. Because it pitches in the middle, you get to decide just how steep of an angle you want by how much taller the center board is than the side boards. Because I kind of made it up as I went I can show you exactly how we did it, so if you want to customize yours a little more than you’ll know just how to do it!


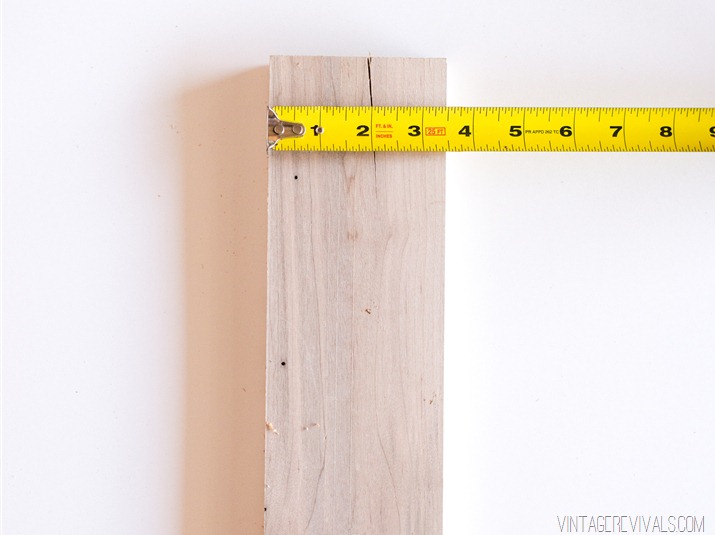
Start by determining your size. Mine was for a king size bed and the original plan was to make it 48” at its highest point and 40” on the sides. (we’ll chat a little bit more about the change of plans in a minute, it doesnt effect the actual tutorial)


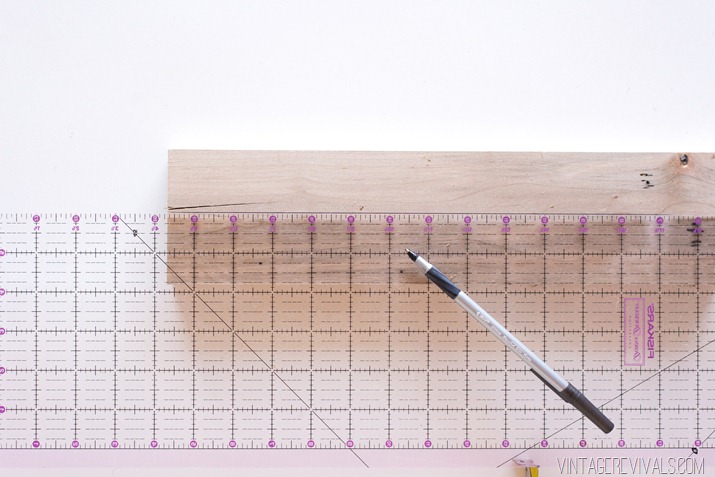
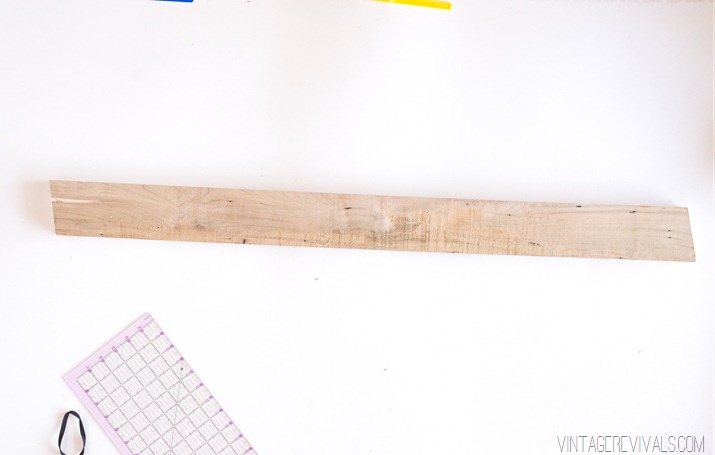
I’m sure that there are some great mathmatical formulas to get the exact measurements and angles, but that’s just now how my brain works so I laid out the boards on the floor of my garage used painters tape to mark where they needed to live.


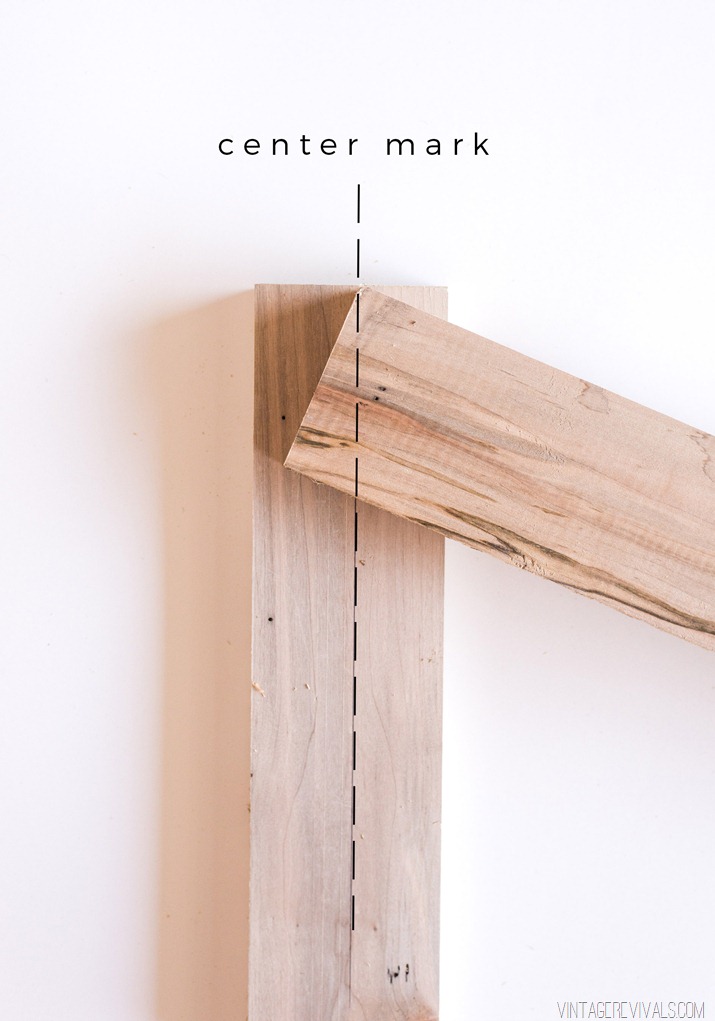
Next I measured and marked the dead center of the middle board.


DIY Slatted Headboard-3

DIY Slatted Headboard-4

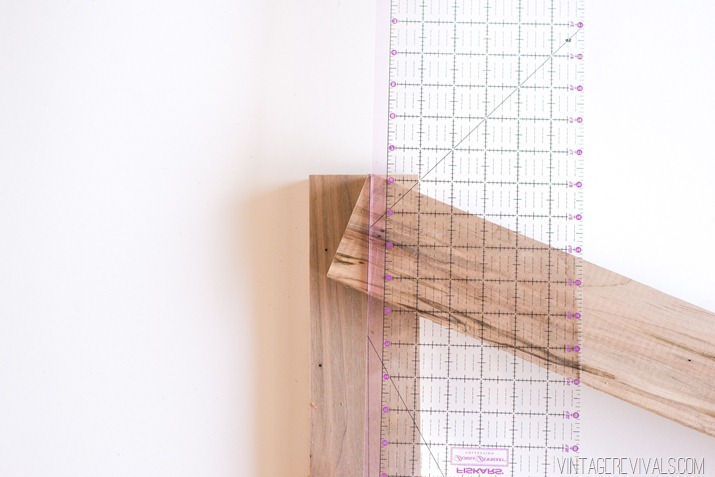
Then I just laid one of the slat boards from the end board to the center line of the middle board, so that the top point of the slat board hit the center of the line I had marked.


DIY Slatted Headboard-6 copy

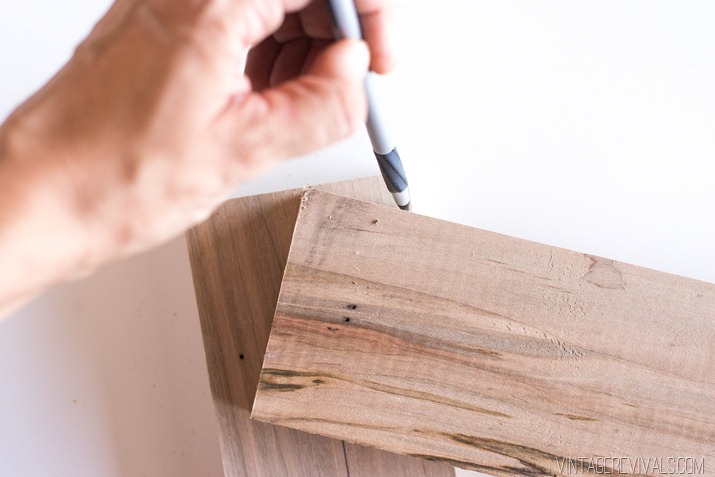
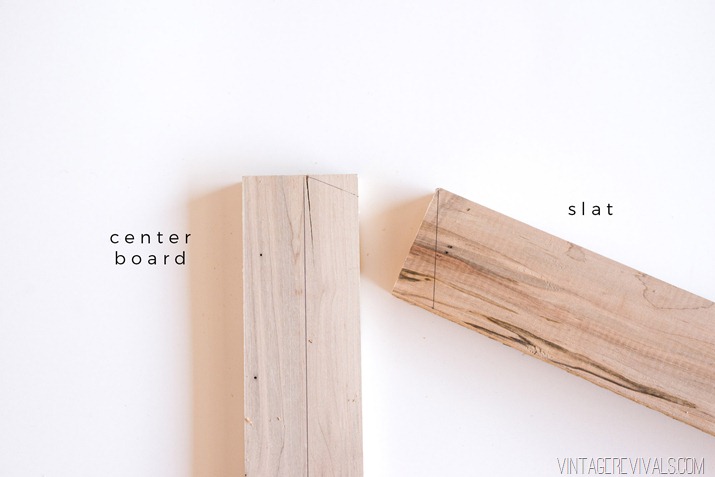
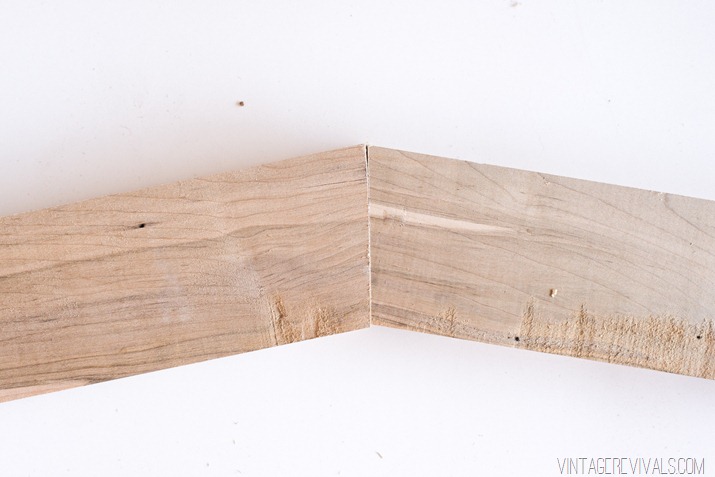
Then I marked the angle on both boards so I knew what needed to be cut off.


DIY Slatted Headboard-7

DIY Slatted Headboard-9

DIY Slatted Headboard-10 copy
Repeat on the other side of your center mark so that it makes a point. Cut off the excess.

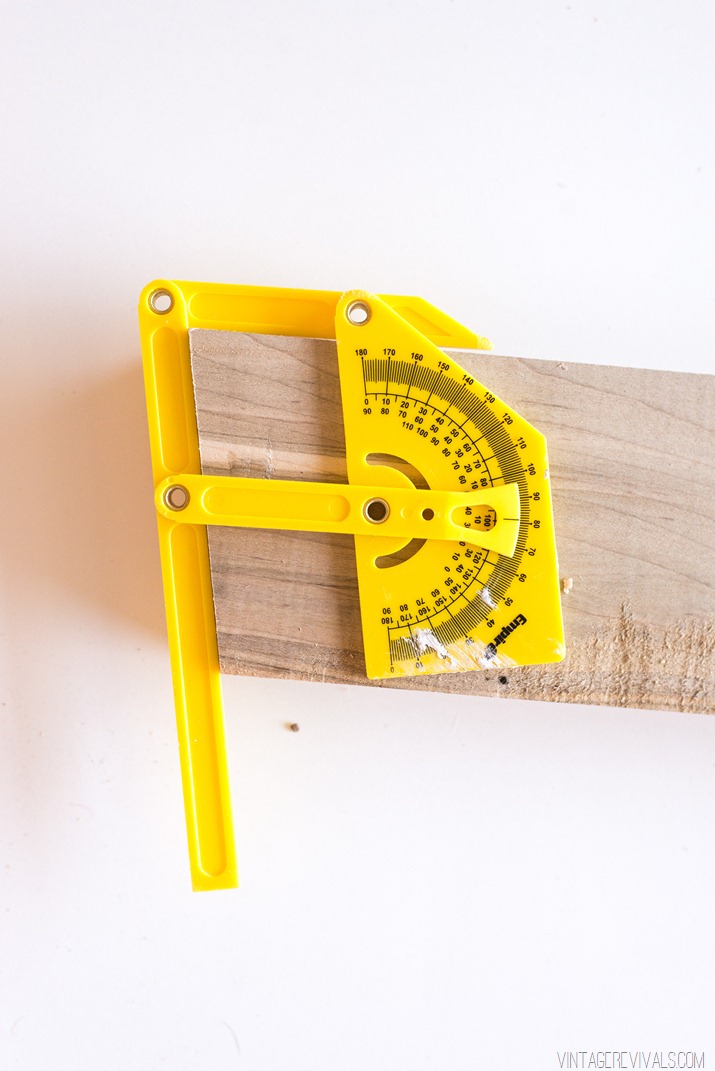
Once you’ve cut your slatted board on the miter saw along the mark, your going to replicate that same angle (mine was 80 degrees, which means that I set my saw to cut at 10 degrees) on both ends of the board for as many slats as you need. I ended up using 8 boards.


DIY Slatted Headboard-13

DIY Slatted Headboard-18
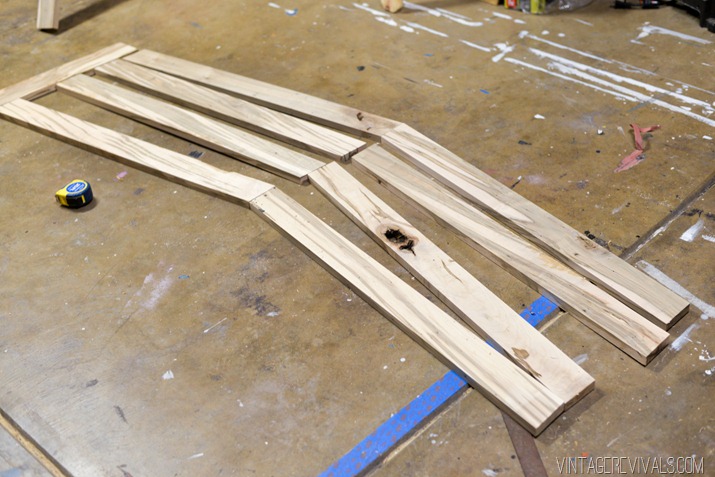
If you’ve marked everything correctly, your slats should fit together and follow the point that you cut into the center board.

DIY Slatted Headboard-14

As much as I wish that I had done this project in a perfectly lighted garage, the reality is that we were building this thing at 1 am. So here is a little real life progress shot for ya…you are welcome.


Slatted Peaked Headboard-4

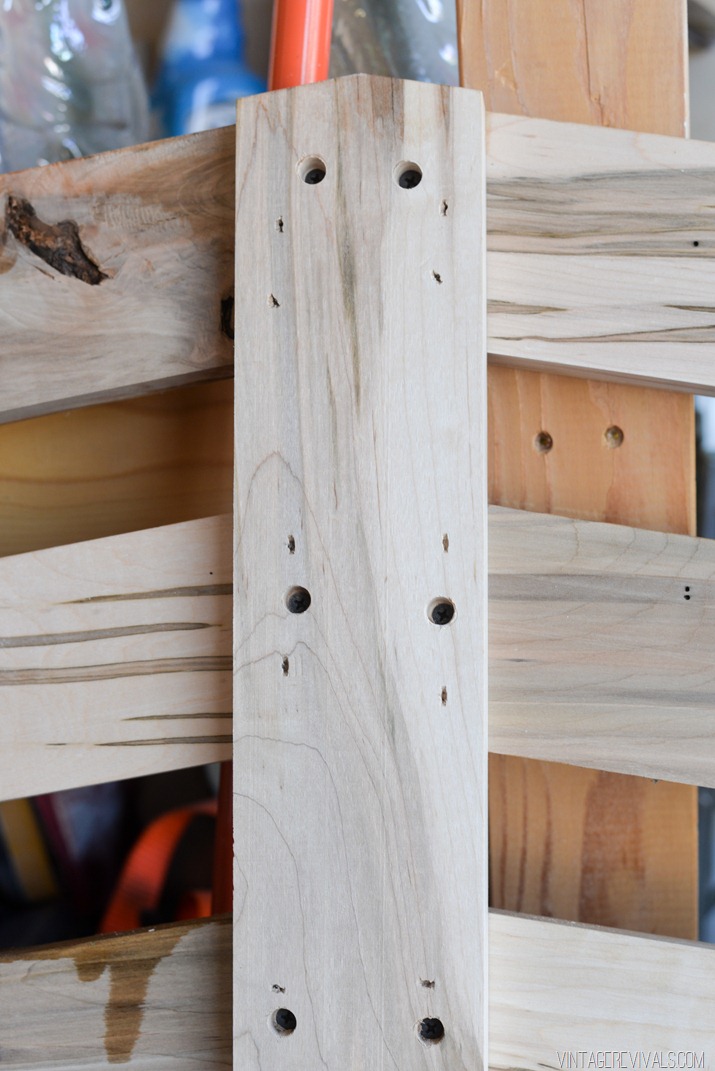
To attach everything together we laid the slats face down on the ground (make sure that the good side is down!) and put our boards on top of them. After we had secured the first set of slats to all 3 boards and made sure that everything was straight, we spaced the slats and attached them with finishing nails, that way if anything was spaced wrong or wonky we could easily fix it before we permanently screwed everything together. That being said, we knew that our center was lined up based on the slats lining up on the edges of the outside boards, and against the spacers, but its still a teeny bit scary when you are nailing something together that you cant see…not going to lie.


Slatted Peaked Headboard-6
Once everything was attached with the finishing nails and good to go, we secured it with countersunk screws and I wiped it down with Danish Oil.

Ok now for the real real life part. When I planned the height of the headboard, I may have guestimated the height of Tyler’s mattress. The only time I had seen it was when it was up on the massive storage base and was really tall. So I used my bed as a guide for where I thought everything would lie once it was on a box spring and frame. When we got everything moved in my heart sunk when I saw that their mattress was literally 1.5 times thicker than mine. It must have been a little bit like what the Princess and the Pea felt like when she gazed up at the top of that daunting GINORMOUS mattress pile. The headboard looked so teeny and dinky and you could see like 2 of the slats.


But we never give up right? Luckily when it was propped up on the bedframe it was the perfect height. Which would have been fantastic and we could have done that and called it a day in a normal situation where the bed is against the wall. This was not that. The bed had to be off the wall, which meant that I needed to find a way to not only stabilize the headboard but secure it so that it was strong enough to lean against.


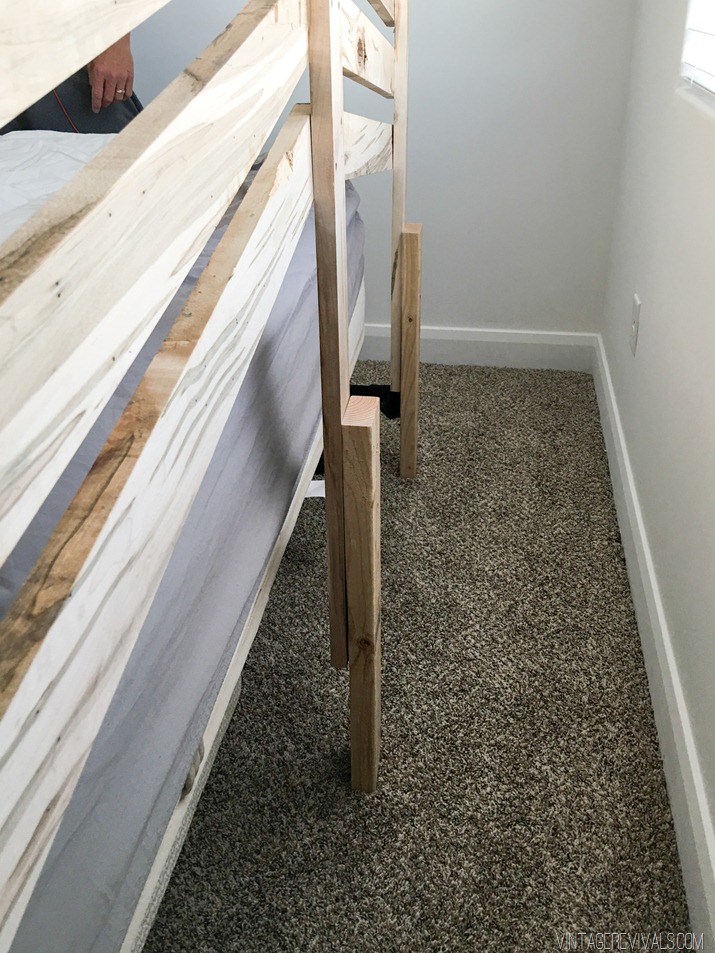
Tyler came to the rescue after he went scavaging for some wood and found 2×4’s in the garage. It might not be the prettiest thing from this angle, but guess what. Its sturdy and no one sees it from this angle. �� Except now the entire internet has…but its real life sometimes.


DIY Slatted Headboard-20

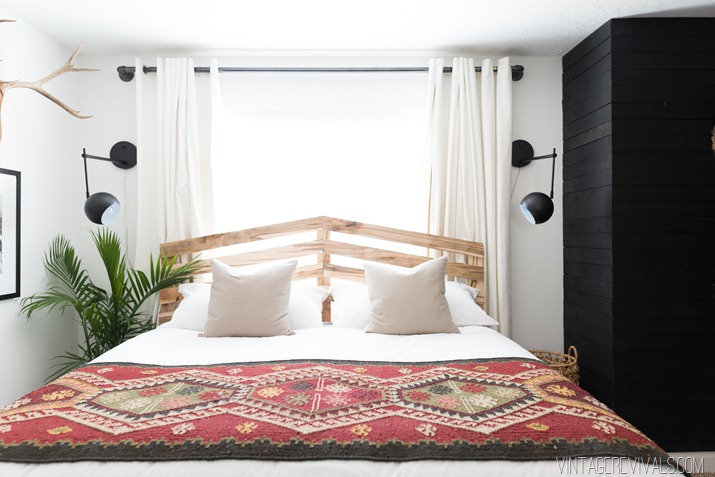
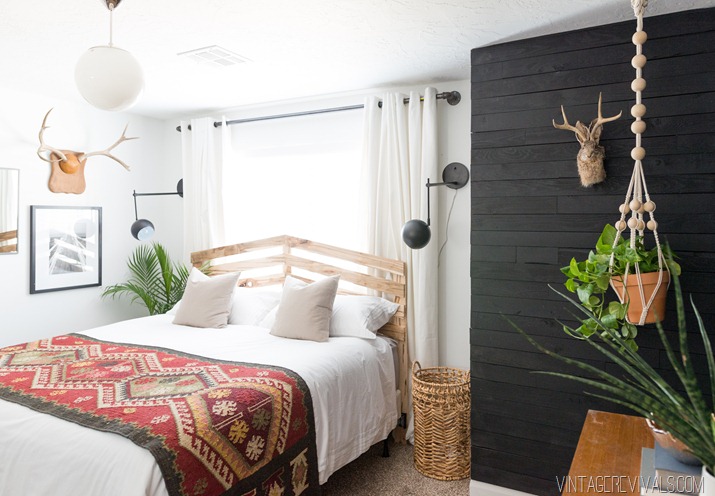
Want to see how much prettier it is from the front?


Vintage Revivals Sleep Sanctuary Bedroom Reveal-49

Vintage Revivals Sleep Sanctuary Bedroom Reveal-43

Vintage Revivals Sleep Sanctuary Bedroom Reveal-14

Vintage Revivals Sleep Sanctuary Bedroom Reveal-42

I’d say it looks pretty freaking fantastic for $70 and an hour of work wouldnt you?


dont miss any of this series

Scandi Sanctuary Room Reveal!

LinkDeli


Original article and pictures take vintagerevivals.com site
[Nachmachtipp] Statement Spiegel

[Nachmachtipp] Statement Spiegel
Sinnenrausch - Der kreative DIY Blog für Wohnsinnige und Selbermacher.

Der einfachste Trick um Weite und Licht in einen Raum zu holen ist: Spiegel aufzuhängen.


Sie reflektieren das einfallende Licht und verdoppeln so optisch die Raumtiefe, perfekt also für kleine und eher dunkle Räume. Unser Flur etwa ist da der absolute Traumkandidat: dunkel, lang, schmal.


Den stärksten Effekt erzielt man übrigens dann, wenn man den Spiegel so hängt, dass er nicht nur viel Licht auffängt, sondern dass auch die vom Spiegelbild getroffene Fläche möglichst hell und frei ist. Probiert das mal aus, ihr werdet überrrascht sein vom Ergebnis.


Neben dem praktischen Wert sind Spiegel vor allem sehr dekorative Elemente und werden immer mehr zu richtigen Designobjekten.

Aus diesem Grund habe ich neben meinem Raindrop Spiegel, der aus schlichten Holzkugeln besteht, einen weiteren "Statement" Rahmen aus dünnem Sperrholz für einen Rundspiegel entstehen lassen.


Dieser lässt sich relativ simple und wunderbar individualisieren:

mit etwas Farbe und einigen Klebepunkten oder was immer euch an Formen und Mustern gefällt.


DIY Statement Spiegel mit geometrischen Rahmen

Nachmachtipp DIY Spiegelrahmen aus Holz

DIY Statement Spiegel


Du brauchst:


○ runder Spiegel

○ Sperrholz(reste) in Kiefer und Pappel

Acrylfarbe in Schwarz

Stichsäge

Heißklebepistole

Schleifpapier

Klebepunkte


So geht´s:


Als erstes legt ihr den Spiegel auf das Holz und zeichnet die Größe mit Bleistift nach. Den so entstandenen Kreis schneidet ihr nun mit Hilfe der Stichsäge aus. Die Ränder schleift ihr mit feinem Schleifpapier glatt.


Nun geht es ans Zeichnen der einzelnen Formen innerhalb des Kreises: Eurer Phantasie sind dabei keine Grenzen gesetzt. Ich fand es schöner, die Teile in verschiedenen Größen und Längen aufzuzeichnen, aber das ist Geschmackssache.


Wenn ihr damit zufrieden seid, sägt ihr die ebenfalls mit der Stichsäge aus und schleift sie an den Seiten glatt.

Ehe ihr nun die einzelnen Teile mit Heißkleber auf den äußeren Rahmen klebt, könnt ihr noch mit Acrylfarbe farbliche Akzente setzen.


DIY Statement Rahmen von Sinnenrausch

Punktlandung


Habt ihr euch auch schon immer gefragt, wofür diese schwarzen Klebepunkte aus dem Bürobedarf eigentlich gut sein sollen? In meinem Fall ganz klar: Um zu verschönern.

Denn um das Schwarz im Rahmen noch einmal aufzugreifen, habe ich ein Holzteil damit beklebt. Falls mir dann irgendwann nicht mehr nach Punkten ist, lassen sich diese ganz einfach wieder abziehen.


Material + Werkzeug*


Ich wünsche euch viel Freude beim Nachmachen und gutes Gelingen,


Original article and pictures take sinnenrausch.blogspot.co.uk site

“W” is for Wood Tags

“W” is for Wood Tags


image from ballarddesigns.com

image from ballarddesigns.com

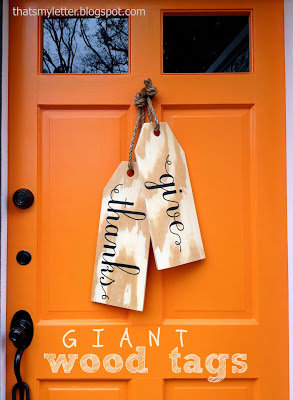
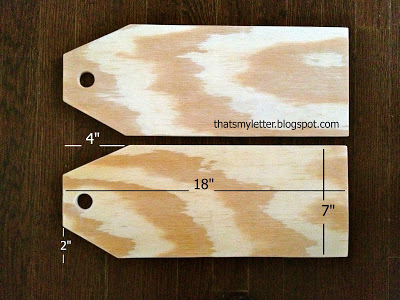
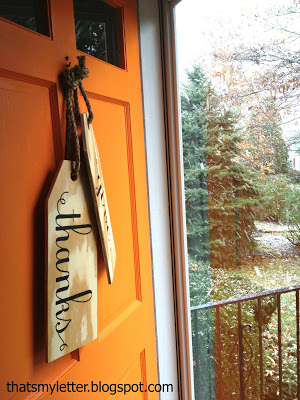
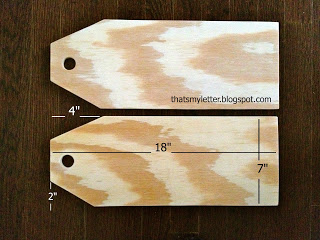
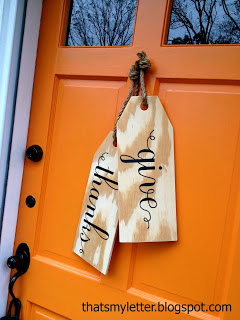
I made these GIANT wood tags for our front door, mine measure 18″ x 7″:


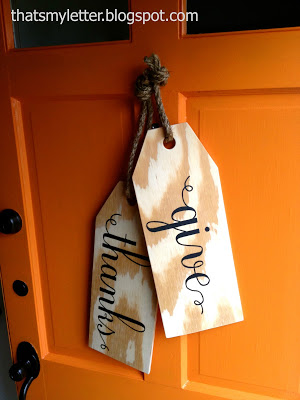
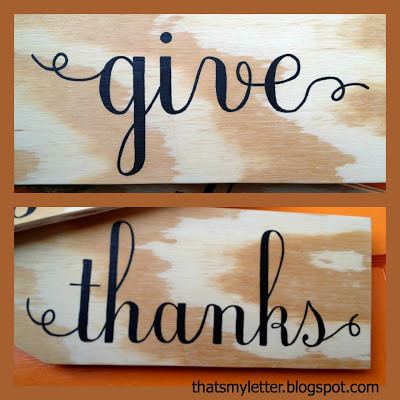
And I handpainted the words give and thanks:

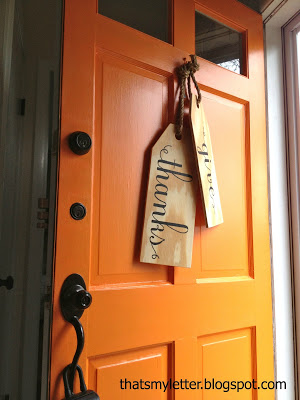
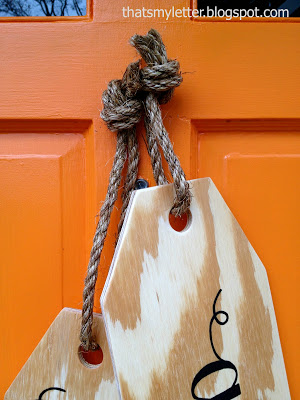
Add some jute rope to hang:


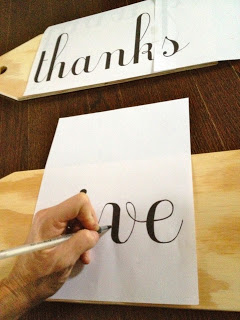
Here’s how I made the giant wood tags:

2. Print out words to fit.

3. Paint on and inside the indent left behind by the pen:

4. Seal with clear semi-gloss poly to protect from moisture.

I’m linking up to:

Original article and pictures take jaimecostiglio.com site